
A beginner’s guide to making Progressive Web Apps
You may have heard about Progressive Web Apps or PWAs for short, I’m not going to go into all the details of what exactly makes up a PWA or how they work. For the purpose of this post, a PWA is a website that you can add to your phone’s home screen and that will work while offline.
I know some HTML, CSS, JavaScript and how to use GitHub.
I am still new to web development and don’t want to learn why and how stuff works right now. I want an easy, basic way to make something that works without going through pages and pages of documentation and tutorials. Hopefully, this post will be all you need to get started in making your own PWA.
To make a PWA we need a website. This of course, assumes you can already make a website that scales well on all types of screens and devices. Luckily we don’t need to do that from scratch, we can use a template. I like the ones from HTML5 UP and Start Bootstrap.
Pick and download a theme, replace all the content with your own in the index.html. You can even change the colours if you’re feeling brave enough to edit some CSS.
For this project, I was making a landing page for Web Community Leads UK and IE. You can find out more about that by reading Daniels blog post about it, or by visiting the site I made https://webcommunityukie.github.io/
Making this website into a PWA doesn’t add much for most users as I’m not expecting anyone to add it to their home screen, but it will still make the experience better. I just wanted a small site to start with to get into making PWAs myself.
I wanted a really simple site, I liked Hacksmiths website and knew it was opensource so I downloaded and gutted it. I did keep in a link at the bottom of the site that refers back to them and the link to the code so people can fork our new site.
Now that we have a website we can start turning it into a progressive web app. To do this we need to add a few things to it which I’ll go through as we need them.
Testing your PWA
To check if your site is working as a PWA you can use Lighthouse. Lighthouse is a chrome extension that will tell you if your site is a good PWA and if it isn’t how to improve it.
Once installed open up your website and click on the Lighthouse icon in the top right of your browser then Generate Report. It will do some stuff then open up a new tab with some information, you could read through it, or you could focus on the big numbers at the top and ignore the rest.

Lighthouse results before I started working on the PWA parts of the site
36/100 isn’t that bad considering I hadn’t started doing anything to the site yet to make it a progressive web app.
Make an app icon
Your site is going to be on a home screen, you need some sort of icon to represent it.
You don’t need to be a designer to make a nice logo. For most small projects I make I go on to the noun project and find one or two icons I like then put them together using GIMP. Then on the layer behind add a gradient background. You, of course, can use whatever method you like to make your icon, just make sure it’s a square.

The Icon I made. Looking back I should have added rounded corners.
You now have an app icon 🎉
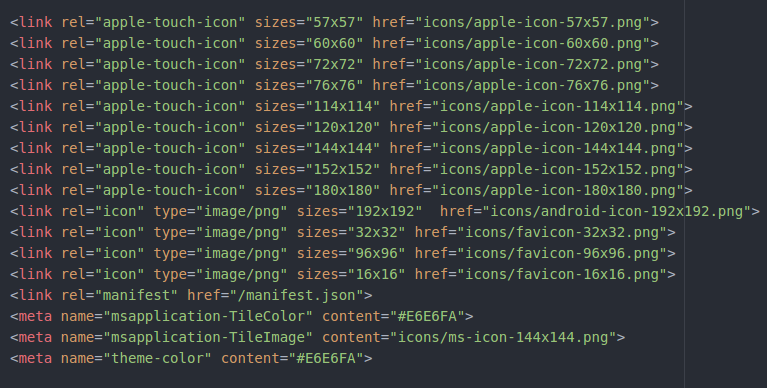
Time to put it on your site. The way I did this was by using this online icon generator tool. Feed it your shiny new icon and it will spit out a bunch of resized versions and some HTML code.
- Download the file it gives you and unzip it.
- Put the icons in a folder next to the rest of your site.
- Add the code it gave you to the <head> of you index.html file
- Make sure the path to the icons is right. I put them all in a sub folder so had to add “icons/” to each line.
Web App Manifest
Next thing to do is create a manifest. A manifest is a file that contains data about a website, like its name, its favourite colour and what icons it uses.
You actually already have a manifest that was created by the icon generator tool, but we’re going to add a little bit more to it.
Head on over to a web app manifest generator and start filling in the info about your site. If you’re unsure of something just leave it as its default.
On the right-hand side of the page, there is some JSON data. Copy and paste it at the top of your manifest.json file, making sure the formatting didn’t break, you may need to add a comma or delete a bracket.
My manifest ended up looking like this.
Running lighthouse again will show you if the manifest works.

Lighthouse score after manifest and icons were added
Adding a service worker
A service worker is another file we add to our project, it will allow the site to work offline. It is also a requirement of a PWA, so we need one.
Service workers are complicated things and I found documentation around them to be long, confusing and full of links to other pages which are just as long and confusing.
Luckily I had Peter recommend that I try sw-toolbox and gave me a link to his code.
So I copied his code and made it even simpler for my project by removing one of the extra JavaScript files and writing it all in the service worker instead.
To create a service worker you’ll need to do 3 things.
- Register the service worker by adding this code to the <head> of your index.html:
- Add sw-toolbox to your project. You just need to add this file to your root folder.
- Create a new file, call it “sw.js” copy and paste in this:
‘use strict’;
importScripts(‘sw-toolbox.js’); toolbox.precache([“index.html”,”style/style.css”]); toolbox.router.get(‘/images/*’, toolbox.cacheFirst); toolbox.router.get(‘/*’, toolbox.networkFirst, { networkTimeoutSeconds: 5});
You’ll want to check that all the file paths look right and edit the precache and list all the files you want to store when offline, I only use index.html and style.css for my site, but you may have other files or pages.
Now, let’s test it with Lighthouse again.

After adding a service worker - Tested on localhost
If you want your service worker to do something slightly different than just save certain pages, such as show a specific offline page when you don’t have internet access you can try out pwabuilder which has a few different service worker scripts you can use.
Hosting it on GitHub Pages
You have a made a PWA, it’s now time to share it with the world.
I’ve found the easiest way to do that is through GitHub Pages as it is free and handles all the security stuff for you.
To host your code on Github is by creating a repository and putting your code inside it, the GitHub GUI will help you do this.
Once done find your repository on the website, go to settings, scroll down and enable GitHub Pages by selecting master branch.
It should then give you a live URL to your PWA.
Running this through lighthouse gives different (better) results and now you can share your site with all your friends, or just download it to your phones home screen.

Lighthouse results after hosting the website on GitHub pages
The code: https://github.com/webcommunityukie/webcommunityukie.github.io
The finished site: https://webcommunityukie.github.io/
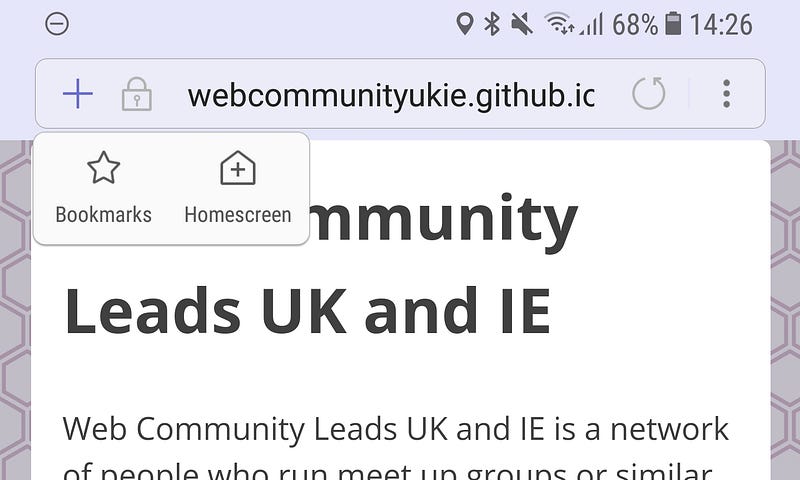
It looks exactly the same as when I started, but when browsing it on Samsung Internet the address bar will change to the theme colour, a light purple. A plus icon will appear which will let you add it to your home screen, which will let you open it up in full screen and use it offline.
There is a lot more to PWAs than mentioned in this post, you can get them to send push notifications when your app gets new content. You can read more about what makes up a PWA.
I hope this has helped you get your first taste of making progressive web apps, if you got stuck along the way don’t be afraid to leave a comment or tweet at me.
Tagged in Web Development, Pwa, Progressive Web App, Beginners Guide, HTML
By uve on July 4, 2017.