
Gamepad API to control parts of an SVG
As easy as rolling your eyes…
Para la versión en español, ver aquí.
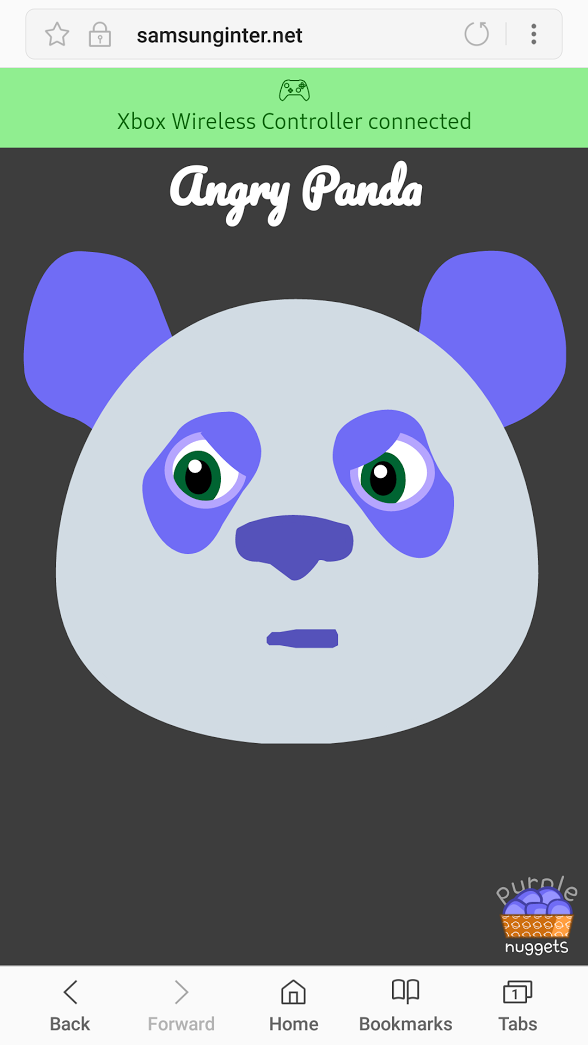
Purple Nugget # 1: Angry Panda
(In case you’re wondering why she’s angry, it’s because she hasn’t had her bamboo yet)
Finished demo and code
You can see the demo here and get the code here. See her in action here: https://twitter.com/diekus/status/952951644043595776
Nugget objective
In our first ever Purple Nugget, we will set up the Gamepad API to control parts of an SVG image with CSS transforms.
Ingredients
- A text editor (VS Code, Sublime Text, Atom, …).
- A web server to try out your nugget (I use Node’s http-server).
- A Browser that supports Gamepad API.
- A Controller (Gamepad).
- SVG editing software (I personally use Expression Design, which is available for free here, but Inkscape or Vectr are also good).
Nugget Time!
This example combines the Gamepad API with SVG images and CSS transforms. What’s interesting about this specific example is that we can embed interaction and animation in a single vector image. SVG generally has the advantage of being lighter that comparable pixel map (raster) images, and scaling can be done without distortions independent of size.
We will divide this example in 3 parts. 1) SVG preparation, 2) setup gamepad, 3) apply CSS transforms.
SVG Preparation
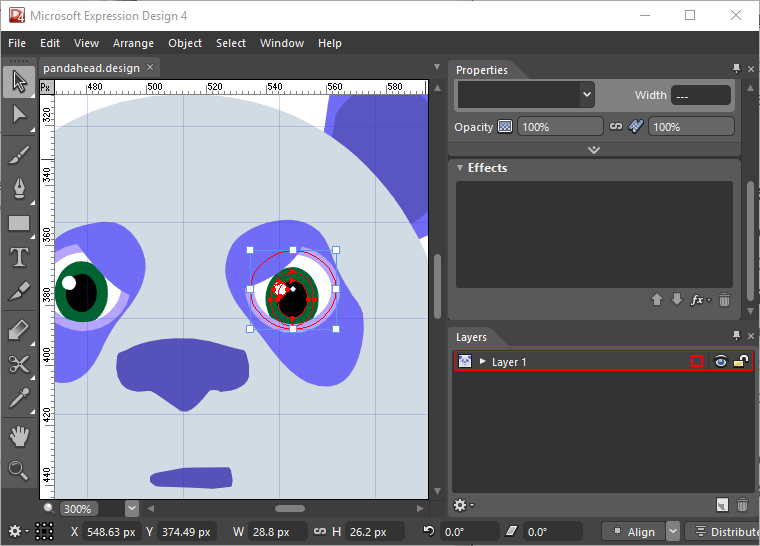
Designing your image
In order to prepare our SVG image we must be clear on which part of it we want to animate/interact with. This is important because we can group elements inside the SVG DOM to be able to control them. In our example, we have decided to move the eyes. We must take this into account since we will group the elements that conform each eye, these are, the green and black circle. To do this, we will nest these two elements inside a
<g id=”eye_R” clip-path=”url(#h)”>
</g>
Gamepad Setup
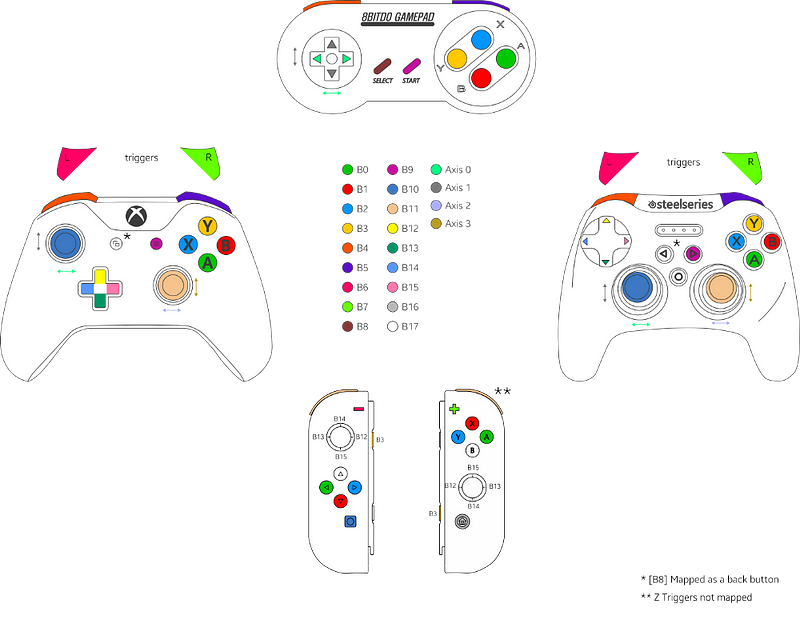
The Gamepad API allows us to access game pads to use in our applications. This is ideal when creating games that will run in the browser, or to control the eyes of our panda. This API maps up to 4 axes and 17 buttons per connected controller! For our example we will use the gamepad’s analog sticks to move the eyes.
The Gamepad API implements two window specific events that allows to detect when a controller is connected or disconnected. Using these events we are providing feedback to the user (on the upper bar of the demo) about a controller connection state. To do this we are updating the color of the gamepad icon on the bar, which is done with a CSS transition (All images in this demo are SVG).
window.addEventListener(“gamepadconnected”, function(e) { gamepadHandler(e, true); }, false);
window.addEventListener(“gamepaddisconnected”, function(e) { gamepadHandler(e, false); }, false);
After having connected a gamepad, we create a loop in which we will poll the gamepad state and updating the UI accordingly. In our case, this means mapping the eye position to the corresponding mapped axes. This loop is generally achieved with a RequestAnimationFrame.
Applying CSS Transforms
The next step is to apply CSS transforms to the different SVG elements. These are the elements that we can reference with the ids we set up previously as “eye_R” and “eye_L” and we do this the same way we would reference any other element with an id in HTML.
eye_l = document.getElementById(“eye_L”);
eye_r = document.getElementById(“eye_R”);
We then proceed to apply a CSS transform to these elements inside the RequestAnimationFrame loop with the values that we obtain from the analog sticks of our gamepad, making the eyes look at the direction we move the sticks.
ax0 = correctSensitivity(gamepad.axes[0], 0.25) * 3;
ax1 = correctSensitivity(gamepad.axes[1], 0.25) * 2.5;
(…)
eye_l.setAttribute(‘transform’, ‘translate(‘+ ax0 + ‘ ‘ + ax1 +’)’);
eye_r.setAttribute(‘transform’, ‘translate(‘+ ax2 + ‘ ‘ + ax3 +’)’);
Other observations
Some final observations regarding the demo.
- In order to have access to the DOM of the SVG, the image code must be embedded in the HTML, and not as an external source of an image tag.
- In order for a transform to be applied to SVG, we have to notice that the syntax and properties can be different from applying it to an HTML element. There are several details that can change, for example, SVG defines its color with “fill” and “stroke” instead of “color” and “background-color”.
- When we have the SVG image we wanna use, it is advisable to pass it through a tool to clean it and minimize it. SVGOMG is a very good tool for this.
This ends our first ever purple nugget! We hope it brings some cool ideas to the table! Get back to us and let us know how can you use this in your own projects, and which other nuggets you’d like to see!
Tagged in SVG
By Diego González on January 17, 2018.