
Tweet My Wedding Dress
Tweet My Wedding Dress
Coming up on two years ago, I attended EMF Camp, ‘a non-profit UK camping festival for those with an inquisitive mind or an interest in making things’, the best way I can describe it is ‘It’s like Glastonbury for nerds’. One of the many incredible pieces on display was a giant inflatable rabbit, that you could change the colour of by tweeting.
](https://cdn-images-1.medium.com/max/2000/1*FVD_M8Z4Q8veIuSp1tHqCQ.jpeg) Photo from http://www.sheffieldhardwarehackers.org.uk/wordpress/2016/10/electromagnetic-field-2016/
Photo from http://www.sheffieldhardwarehackers.org.uk/wordpress/2016/10/electromagnetic-field-2016/
The idea of changing the way we interact with tweets really resonated with me. When we tweet we broadcast a view that we hope other people will observe and respond to. Taking this from the virtual to the physical world changes the way those interactions and responses happen. You can delight or surprise someone, potentially from half the world away.
A scenario kind of like that iconic scene from sleeping beauty played out on my head, where two people could be warring to change the colour of the rabbit.
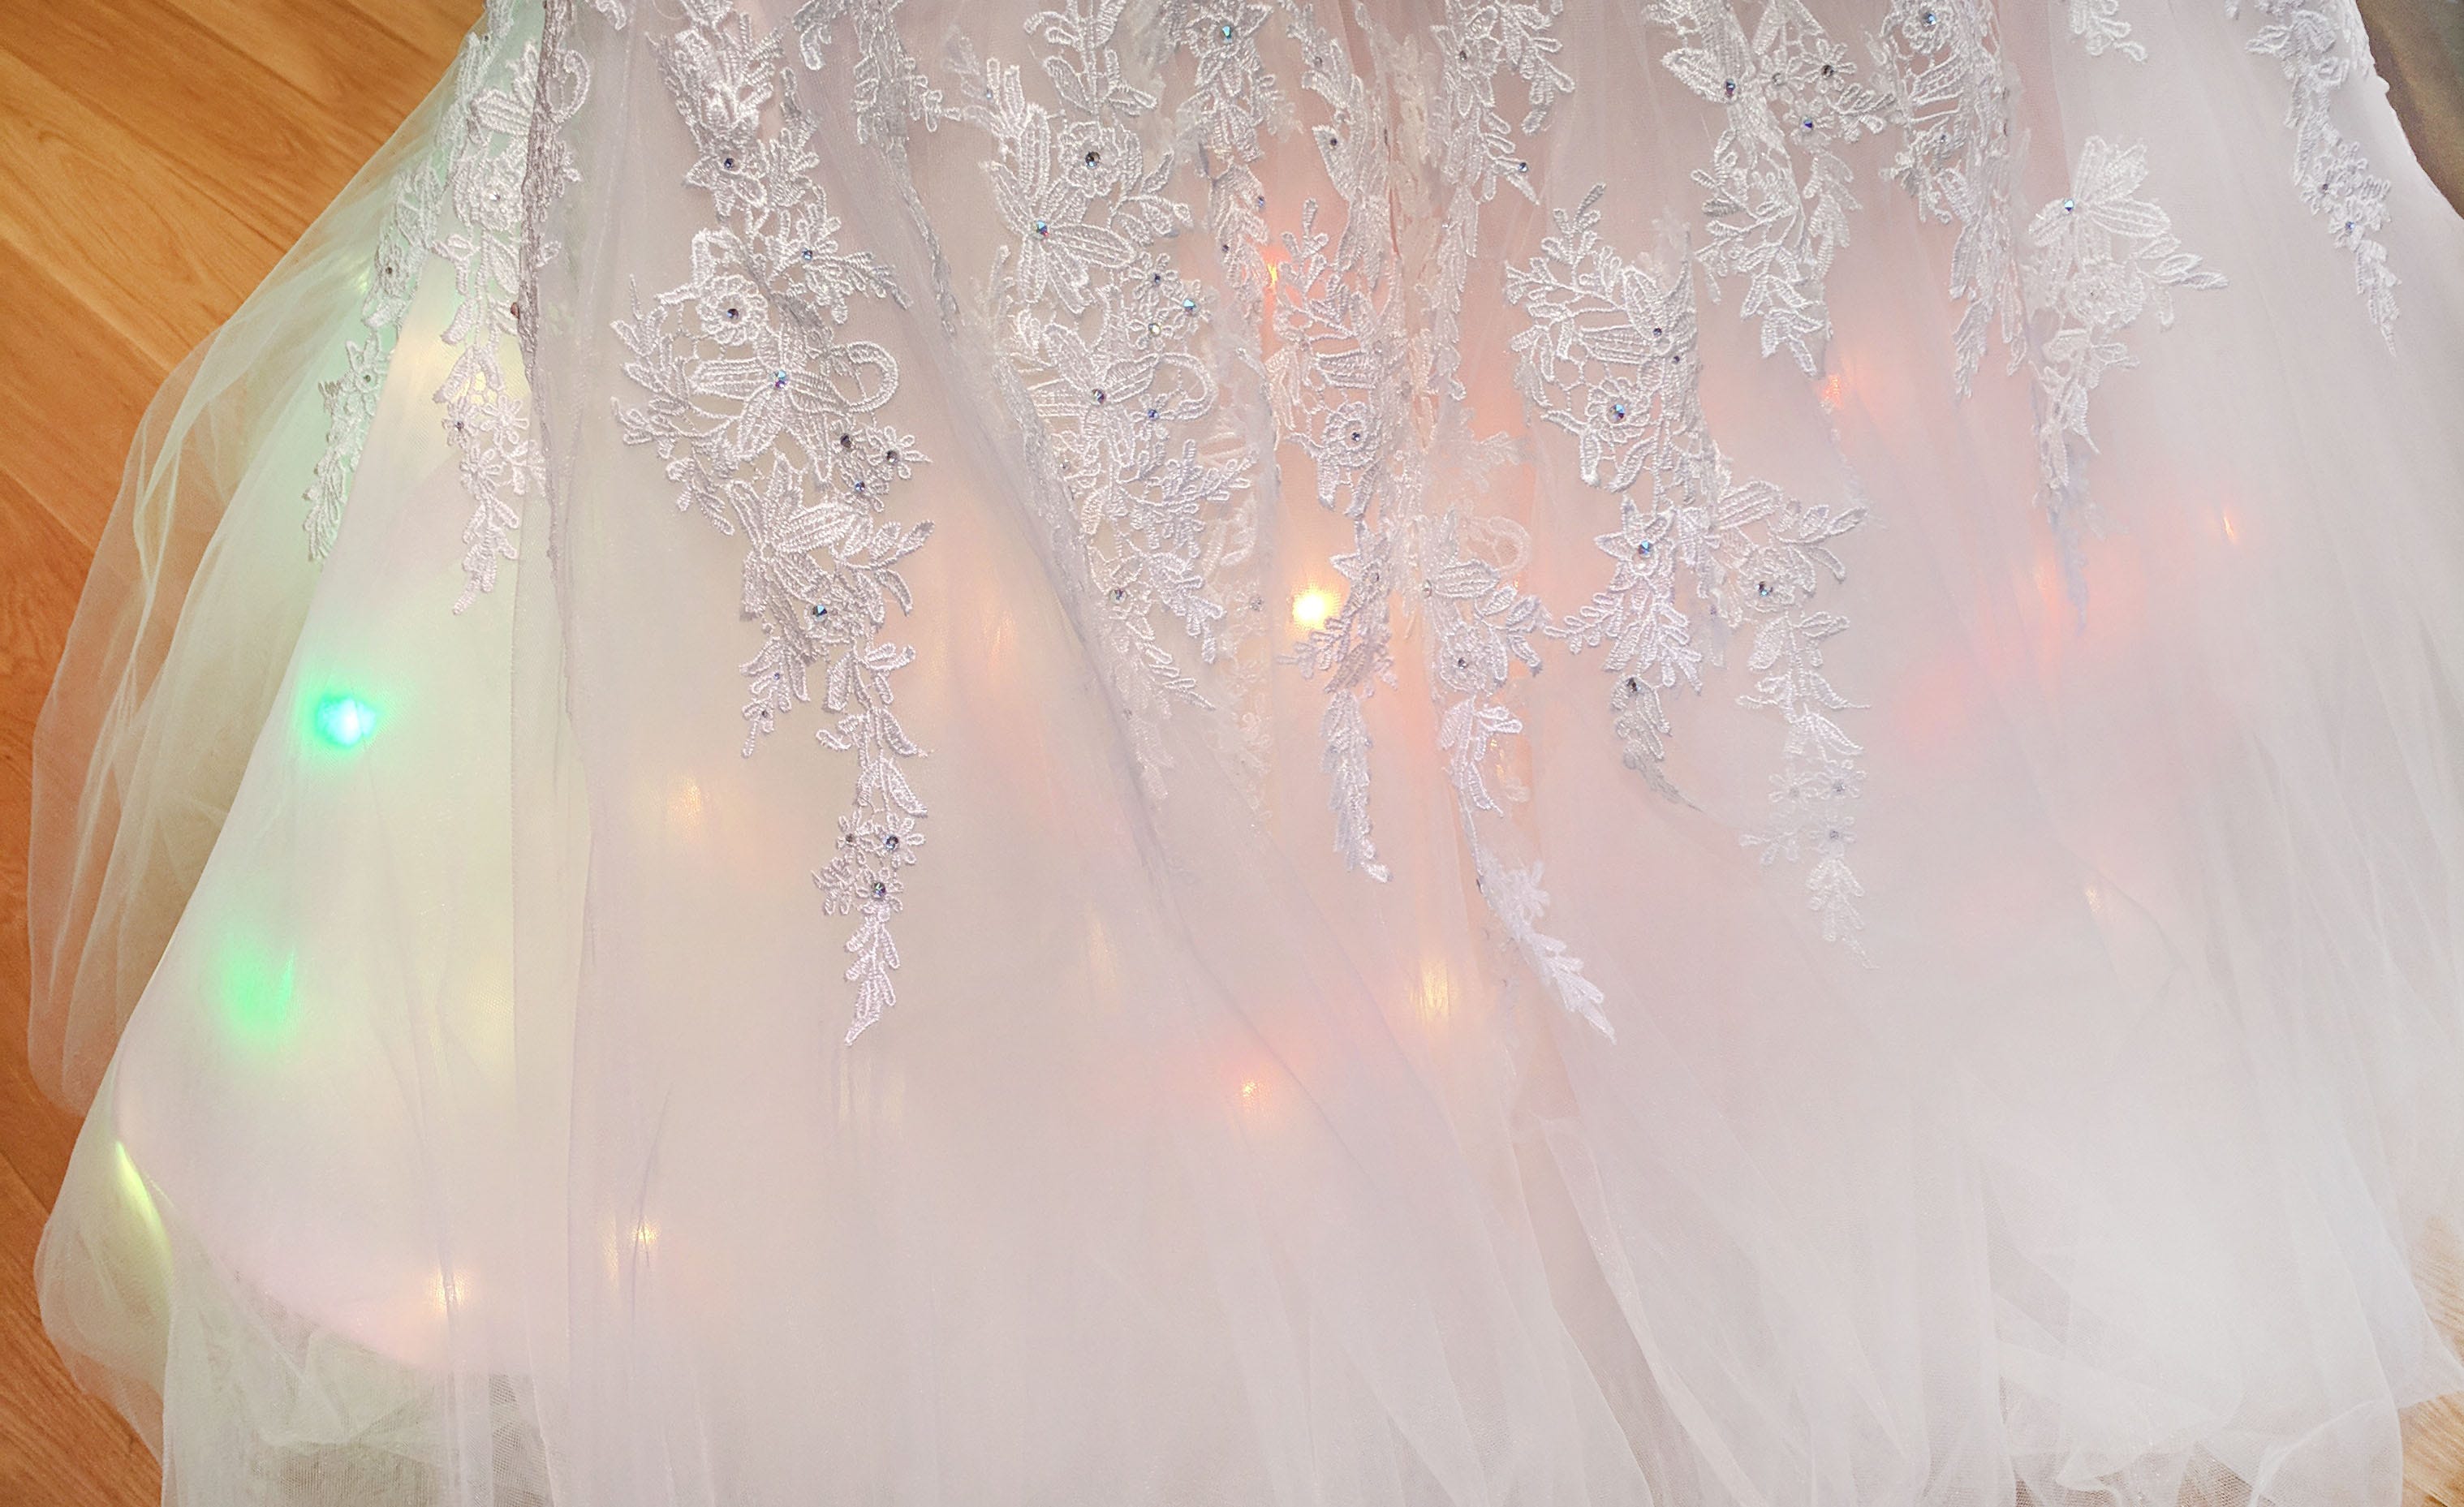
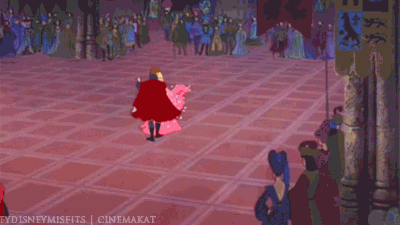 Aurora dancing as her dress changes colour
Then I thought, what if the LEDs in the rabbit were wearable, what if they were in a dress, what if they were in my wedding dress?! My friends, and indeed anyone from around the world, would be able to change the colour of my dress and it’d be like having their thoughts and well wishes right there with me while dancing. Here began my quest to make a tweetable, light up wedding dress.
It’s been a while since my electronic engineering degree, and I’m a little ashamed to say that those skills have well and truly rusted. I knew that i needed some kind of programmable LEDs and a microprocessor to control them. The microprocessor had to be small enough to conceal in a dress and also have a method of wirelessly connecting to the outside world, either WiFi or Bluetooth. I started off my quest by asking Twitter for advice. The response I received was a little overwhelming but the key things that I took away from it were
-
There is a microprocessor called an Adafruit Feather Huzzah which is small, lightweight, well documented and has WiFi connectivity — perfect for what I needed.
-
I wanted some kind of addressable RGB LEDs, Adafruit makes some great ones called NeoPixels, which come as a strip or individually.
-
There is a project called Cheerlights which already does the exact thing I wanted, uses the Twitter API to listen for the handle @cheerlights and a colour and provides an API with that colour.
Getting Started
I purchased
-
100 RGB LED pixels. I wanted to be able to space them out in a non-uniform layout so I didn’t want to use a strip, but I couldn’t afford to buy the individual Adafruit Pixels, so I bought some cheaper knockoffs from eBay (sorry Adafruit!).
What I should have also purchased
-
[Jumper cables](http://uk.farnell.com/pro-signal/psg-jmp150mm/jumper-cable-150mm-dev-board/dp/2452750?mckv=AwRPYMv0_dc pcrid 78108293469 &gross_price=true&CATCI=aud-308408796421:pla-131289767589&CAAGID=14990229429&CMP=KNC-GUK-GEN-SHOPPING-PRO_SIGNAL&CAGPSPN=pla&gclid=Cj0KCQjw-JvaBRDGARIsAFjqkkoTHCrhlMKv1fF-1w47Es6cJkwn28d0iizuT0Z9-zVRIQkISmLd4YMaAjKiEALw_wcB&CAWELAID=120173390000560710) - Crocodile clips and/or a breadboard
And I attended SexTechHack. My aim for the end of the hack was to hook them up to the Cheerlights API. The lovely thing about attending a hackathon, especially one that is inclusive and friendly (and where you have a string of bright colour changing lights) is that you will get offers of help from lovely people who’ve experience to share.
They showed me the correct libraries to install in the Arduino IDE for the Adafruit feather, and I was well on my way.
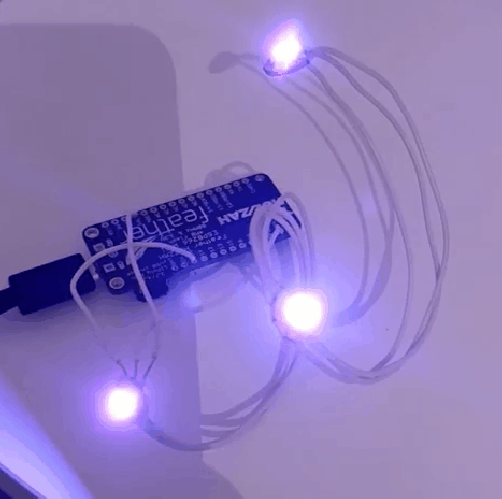
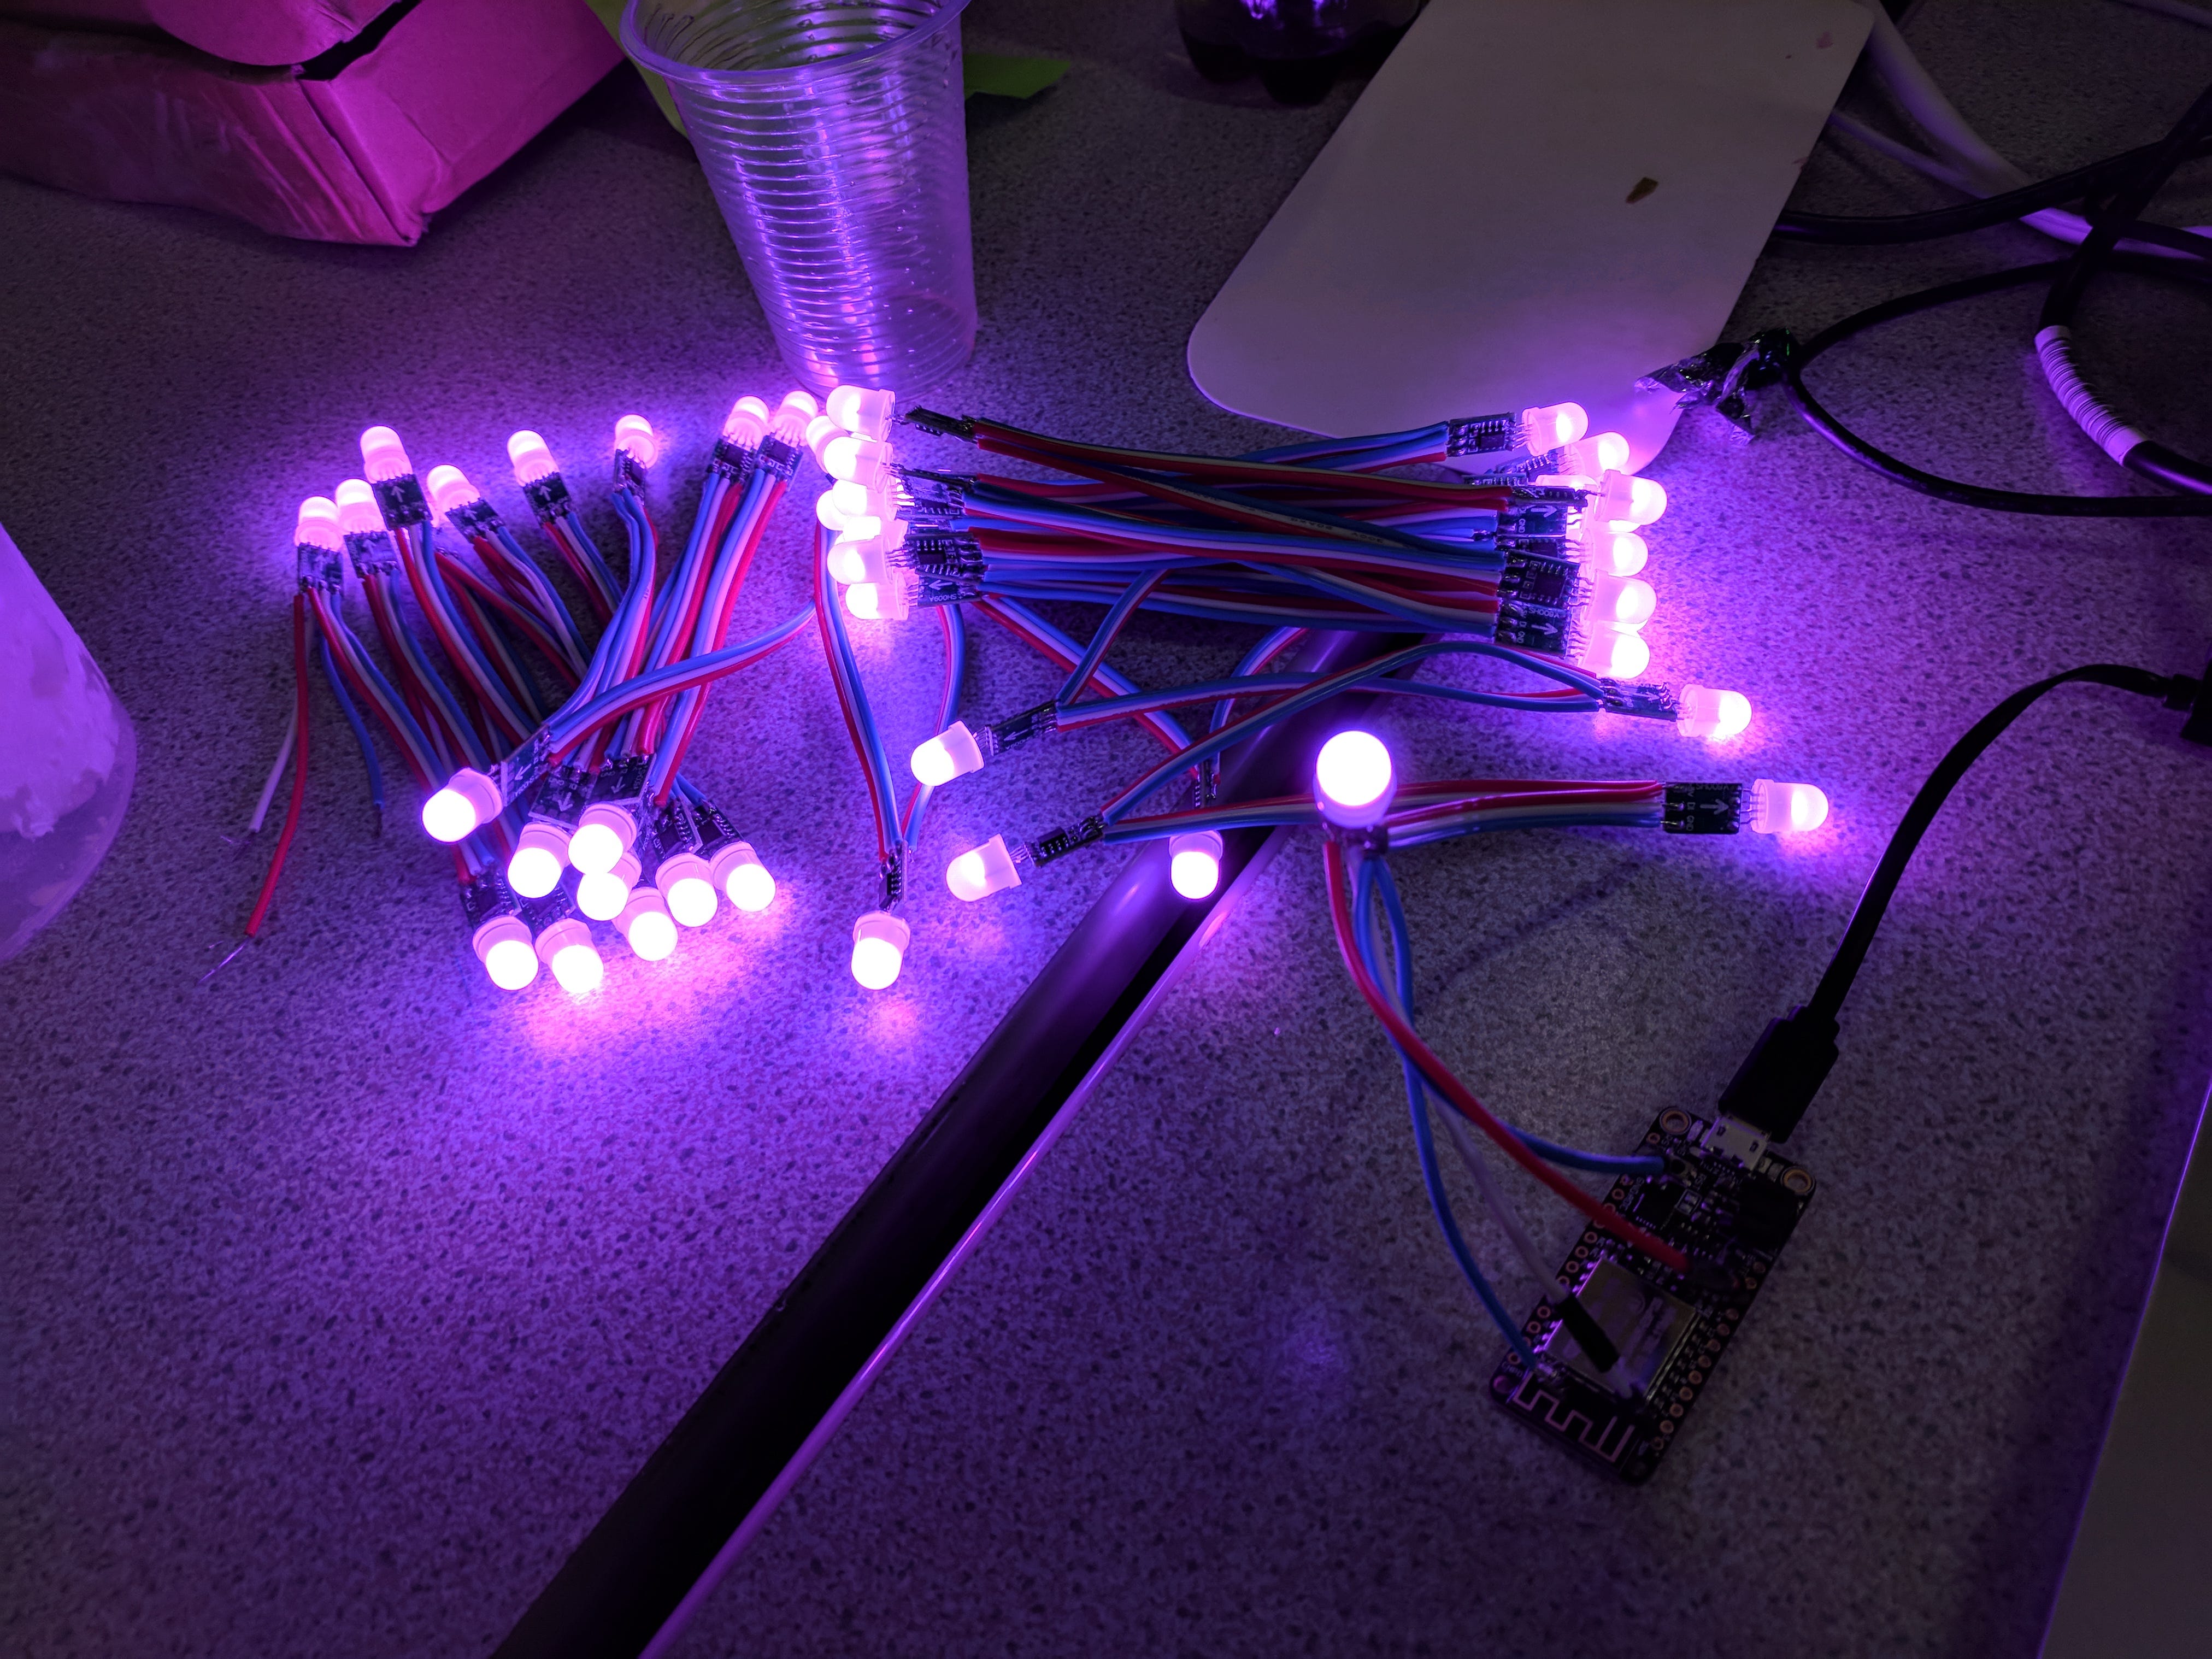 My first attempt at RGB LEDs and the Adafruit Feather, set up while at SexTechHack. These lights were way too heavy to put in a dress so I then decided to go for individual pixel LEDs.
Setting Up the Arduino IDE to use the Adafruit Feather
If you don’t already have it then you’ll need to install the Arduino IDE
https://www.arduino.cc/en/Main/Software
I then followed the instructions in this tutorial to get set up with the Feather: https://learn.adafruit.com/adafruit-feather-huzzah-esp8266/using-arduino-ide#install-the-esp8266-board-package
That tutorial gives you code for both a blink test and a wifi connectivity test. I set up a wifi hotspot on my phone to connect to so that I wouldn’t have to constantly update the SSID/Password info also so that I could potentially travel with the board and it wouldn’t lose connection.
Connecting one or more Addressable RGB LEDs to the Feather
Again, this has already been written for us! The Adafruit Library provides us with a strand test. Install the Neopixel library here https://learn.adafruit.com/adafruit-neopixel-uberguide/arduino-library-installation
Next, we need to connect up the lights and the board! The easiest way to do this is with jumper cables and crocodile clips if you’ve got them, or with a breadboard. If you’re feeling certain then you can jump right in with solder, or if like me at the time, you have none of these things you can precariously balance everything and hope that touching contact will be enough…
You’ll need to identify the ground (GND), 5V and Pin 4 on the feather Huzzah,
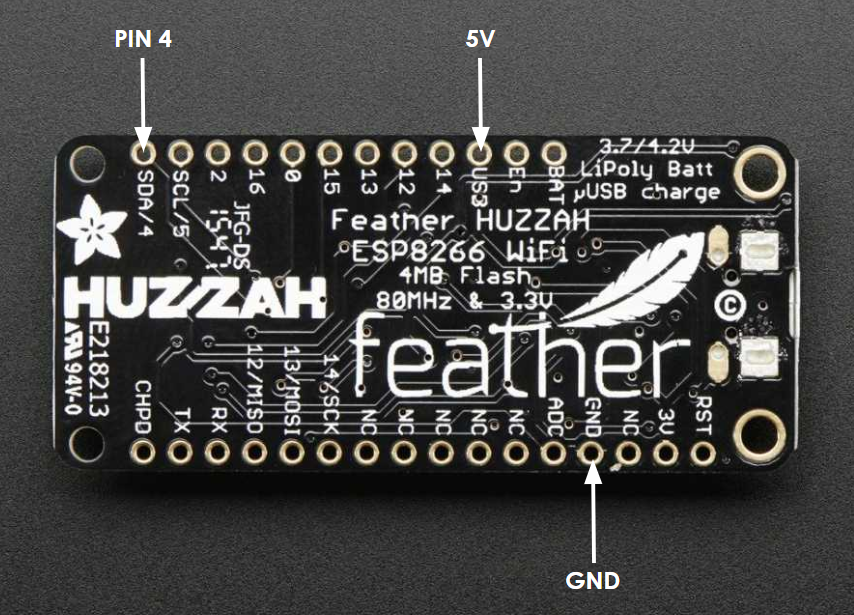
Connect ground to ground on your LED, 5V to the + or 5V connector and Pin4 to In.
Wiring up this project is fairly straightforward. You’ll need to connect the following:
HUZZAH GND → RGB LED #1 (GND) HUZZAH 5V → RGB LED #1 (+) HUZZAH Pin4 →RGB LED #1 (In)
If you’re using separate pixel LEDs then connect them together, GND to GND, + to + and out to in. The Out/In line is what will get the data to your pixels to tell them what colour to change.
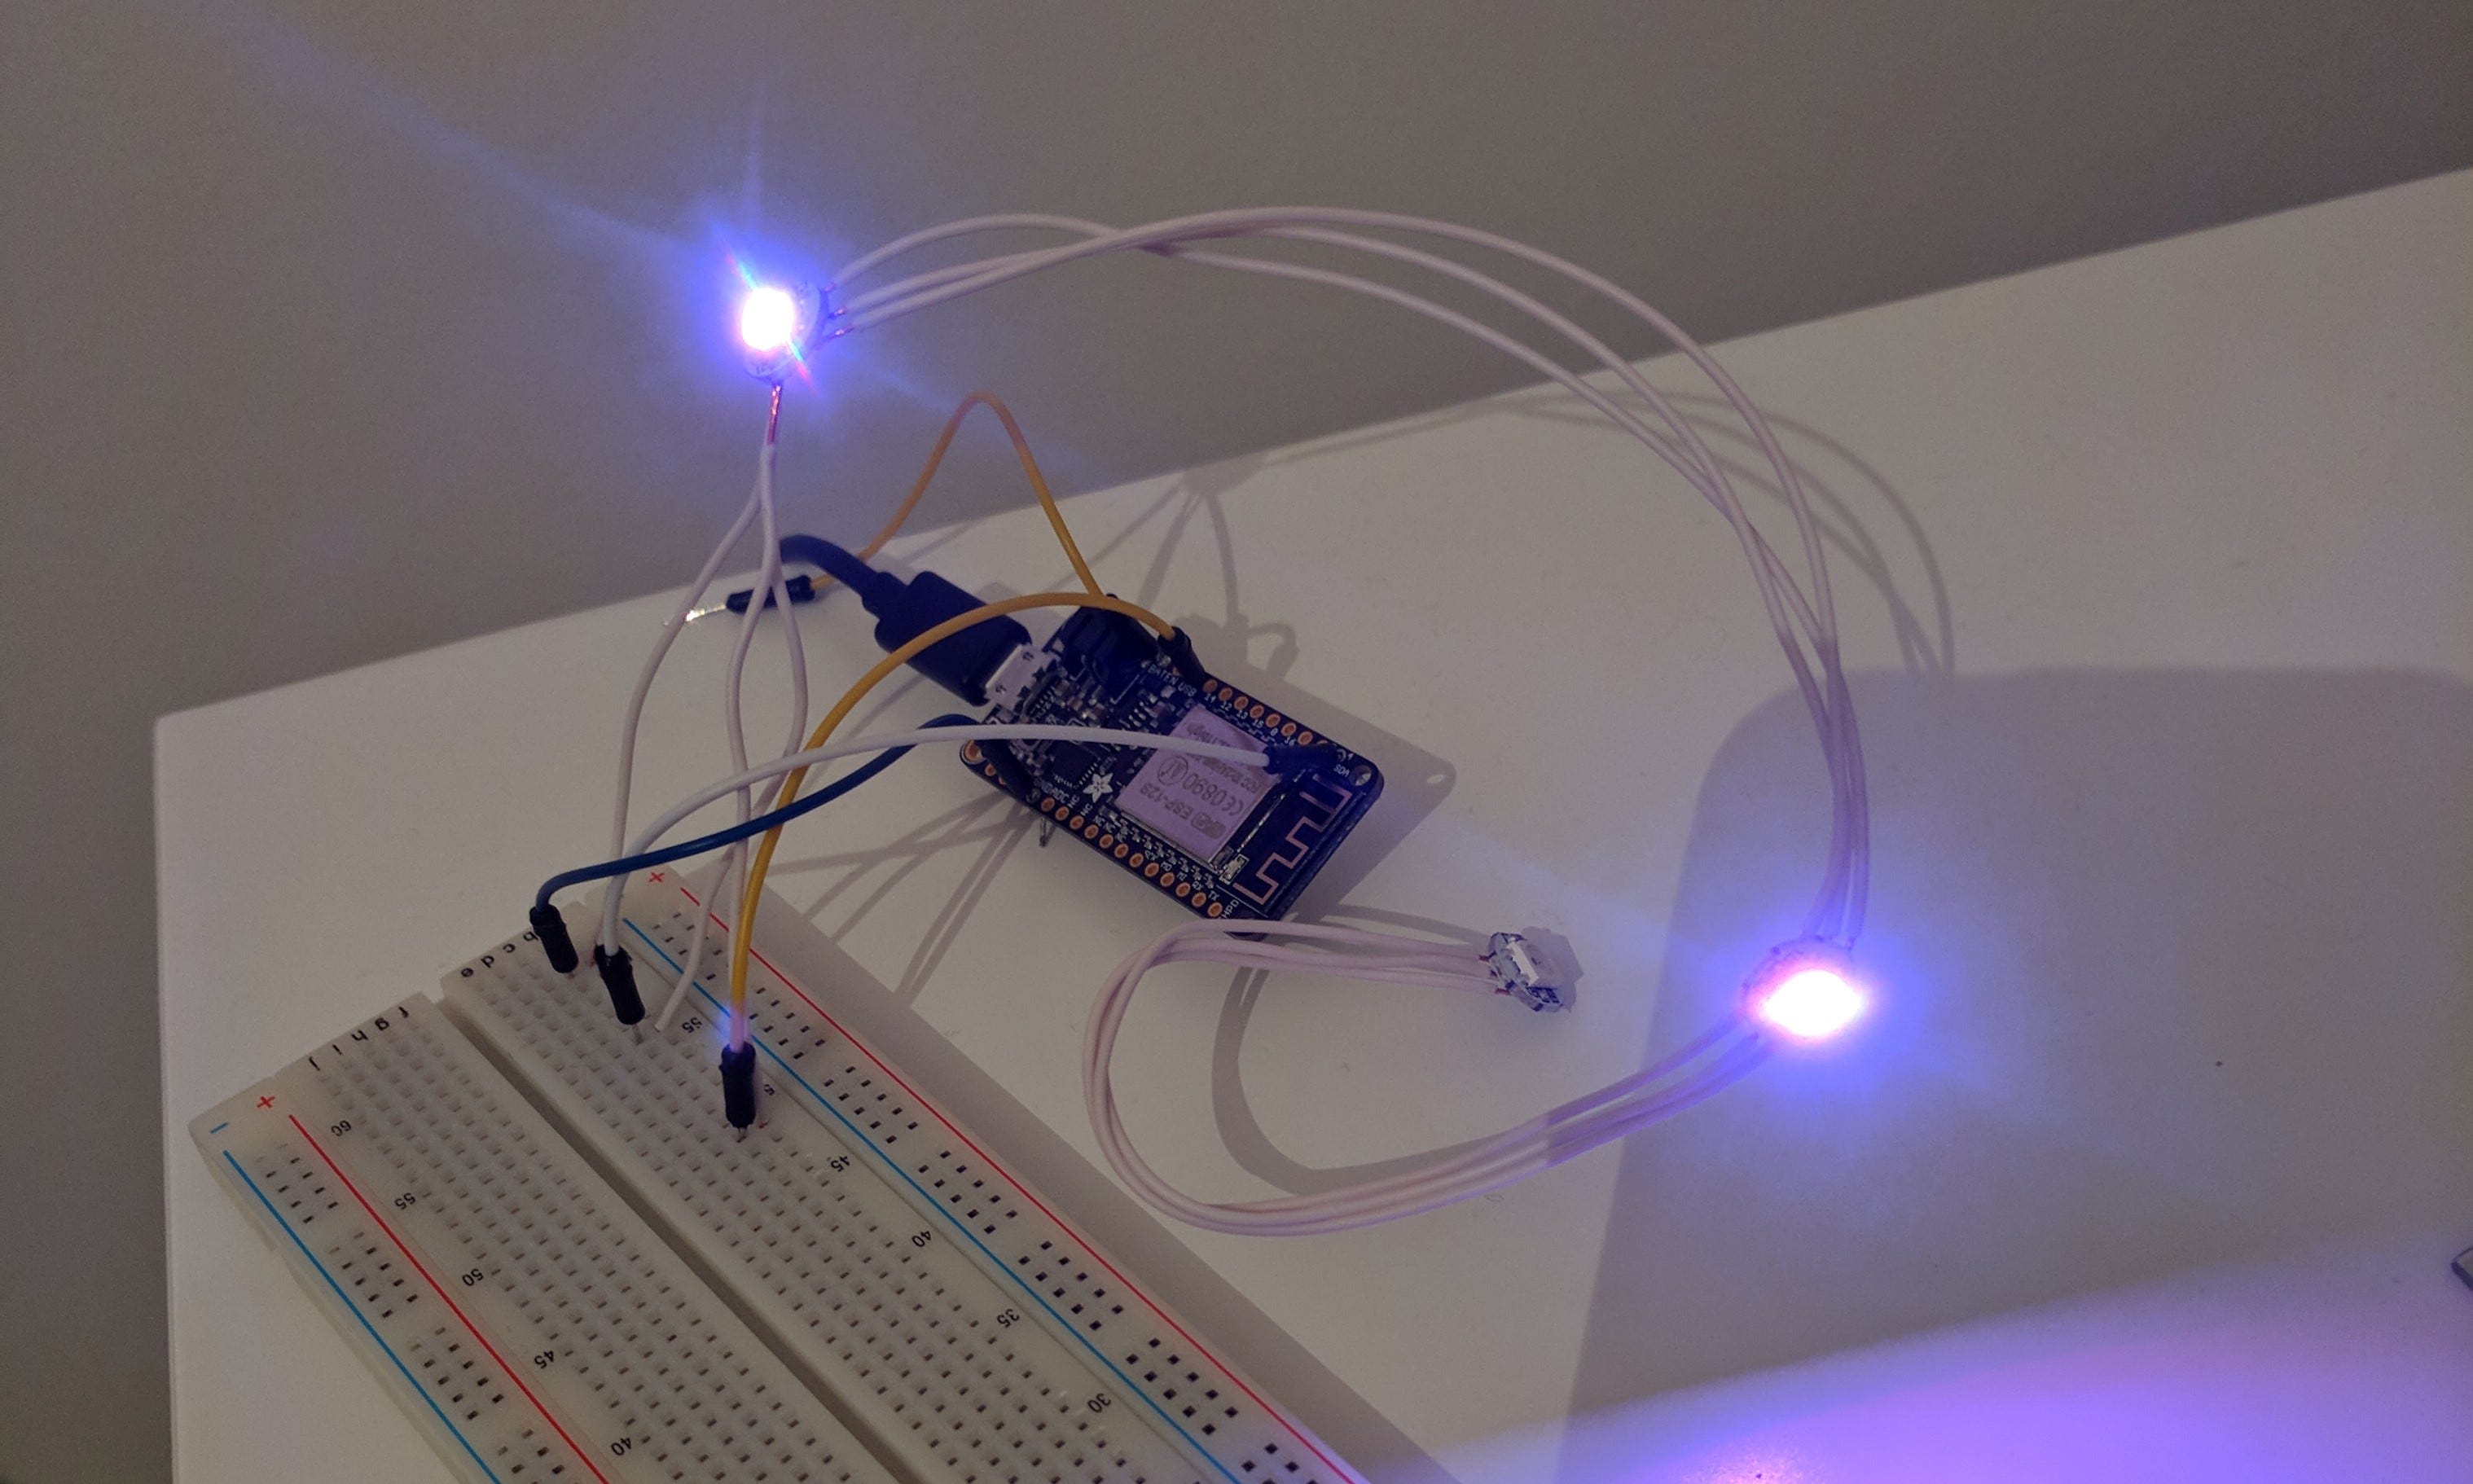 Connecting individual pixel LEDs to the Adafruit Feather using a breadboard.
You’ll need to provide some power to the system. While you’re programming your Feather, this’ll be drawn from your computer via the USB cable. But once you’re out in the wild you’ll need a power source. I bought some USB ‘lipstick batteries’ which are tiny little rechargeable power banks. The plan being to have one charging and one in use in the dress so that I could swap them out when the one in the dress runs out.
Upload the strand test to the Adafruit board using the Arduino IDE and you should see the LEDs show a rainbow of colours.
Which is very beautiful, but only the beginning!
Using the Cheerlights API
Once I had a working board and LEDs I wanted to test it out with Cheerlights. Cheerlights have a whole bunch of resources to get you started, including a library for the feather. You can follow the instructions here to get it set up with your Adafruit Feather
https://learn.adafruit.com/cheerlights/libraries-and-code
Edit the PIN and number of LEDs if you need to for your setup.
Aside on LEDs
RGB LEDs are so called because they are actually three LEDs in one, a red a green and a blue. Much like when you mixed paints in art class to make new colours, RGB LEDs use combinations of these three colours in different intensities to make a large spectrum of colours. When you want to set the colour of an RGB LED you have to give it three values, one for red, one for green and one for blue.
If you take a look at the Cheerlights code you’ll see a table of colours, given in three numbers — something like RGB(100, 100, 100). The values for each of the three numbers can range between 0 (being least intense, or off) and 255 (being most intense).
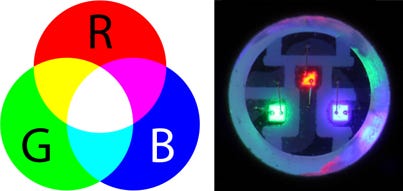 RGB Colour mixing and an RGB LED pixel close up
So, for example, RGB(255, 0, 0) would be fully bright red, no green, no blue, so the light would shine red. RGB(255, 0, 255) would be fully on red and blue, giving a purple colour.
Once the Cheerlights code has been uploaded to your board, you should be able to tweet @cheerlights with a colour and change the colour of your lights, and the lights of everyone who is also connected to the Cheerlights API around the world! What a lovely project.
But it still wasn’t quite what I wanted. While I love the idea that we can change lights in other people’s homes, for my wedding dress I wanted something a little more personal, I wanted to know that when the dress changed colour, it was because someone meant to change my dress and only my dress. So, what did I need to make this happen?
-
A Twitter account for people to tweet at with a colour
-
Access to the Twitter API to get the tweets that people sent to that account (including hosting for OAuth files)
-
I needed a way to convert html colour names into RGB values
-
I needed to get my Adafruit to connect to the internet
-
Get the RGB colours to the Adafruit to change the colour of the lights in the string.
Setting up a new twitter account was fairly straightforward. Then came the task of getting data from the Twitter API.
Writing the code
The Twitter Mentions API
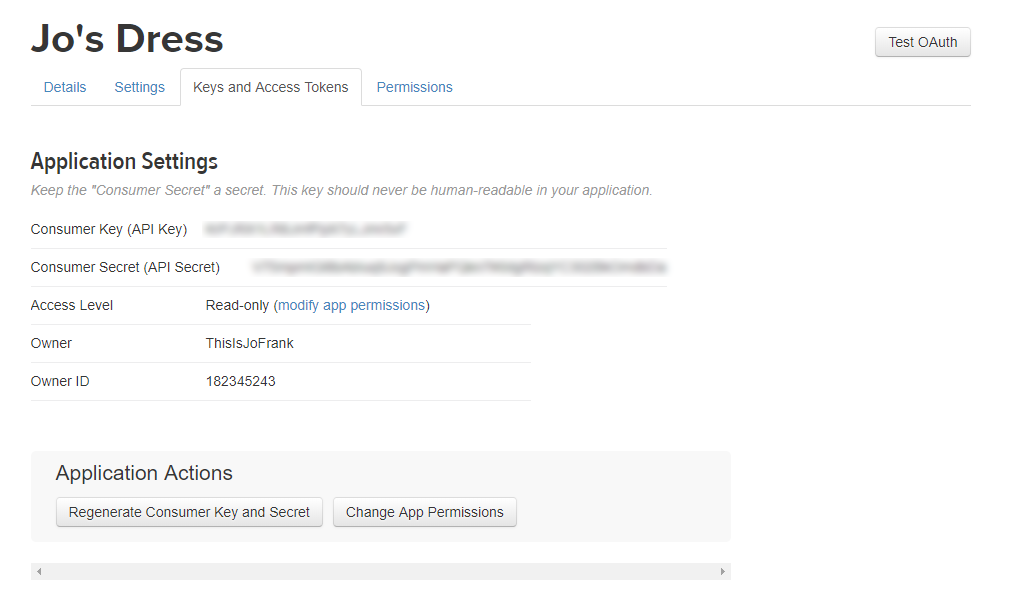
As part of the new v1.1 Twitter API, they offer the GET statuses/mentions_timeline which will return the 20 most recent mentions for the authenticating user. With their new API, Twitter have made getting your tweets a little more difficult than it used to be, we now need authorised access, which is provided using OAuth ([if you’d like to read more about OAuth, this is a great article](https://www.csoonline.com/article/3216404/authentication/what-is-oauth-how-the-open-authorization-framework-works.html)). In order to get a list of publicly available tweets we have to have a ‘bearer token’. In order to get this token, we need a consumer key and a secret key which will be passed through the OAuth endpoint. You can get both of these keys by creating a Twitter App which you can do for free at https://apps.twitter.com/. Sign in with the Twitter account that you want to use and create a new app. You will have to give it a name, description and have a website for your app. I set mine up with a glitch URL. You can leave the callback URL field blank.
Once you’ve got a new app set up, you should be able to open the ‘Keys and Access Tokens’ tab. Click on the ‘create my access token’ button and you should be presented with a list of Settings including the Consumer Key and the Consumer Secret. (Keep these secret, don’t share them!)
In order to use these keys, we will need some server-side code which will allow us to authenticate using OAuth. The simplest method that I could find to do this was using PHP and a pre-written OAuth library. I used this one by Matt Harris. You’ll also need a server where you can host these files. I already have my own hosting from hosting my own website, so I put it there, but you could use Heroku or any other hosting platform of your choice. Clone a copy of the repository and host it on the server of your choice.
I used PHP to connect using OAuth and get the twitter mentions of @josdress. I made an array with all of the colour names as keys and their RGB equivalent as values. I then checked the content of the received mention for whether or not it contained one of these colour names, then got its RGB value. I then output this RGB value as JSON so that my Adafruit feather could access it.
You can see my code on glitch here
Getting the values to the Adafruit Feather
I used a very similar set up to the one that the Cheerlights examples uses to get my new RGB JSON data. I connected the board up to wifi, did a GET on the URL that i was hosting the JSON at and then took those three numbers and sent them to the LEDs to change the colours.
Making it more complicated (rainbows!)
Anyone who knows me knows that I love rainbows. Single colour lights just didn’t quite cut it for me. I wanted to add in a secret ‘rainbow’ option where if you tweeted the word ‘rainbow’ to @josdress then the LEDs would cycle through rainbow colours. That meant that I had to add an extra check on the data I was getting from my JSON. If it contained the word rainbow then, instead of checking the RGB values and setting the LEDs it ran the rainbow cycle from the RGB string test we ran when we were setting up the board earlier.
You can see my code on glitch here
Soldering, Gluing, Sewing and Generally putting it all together
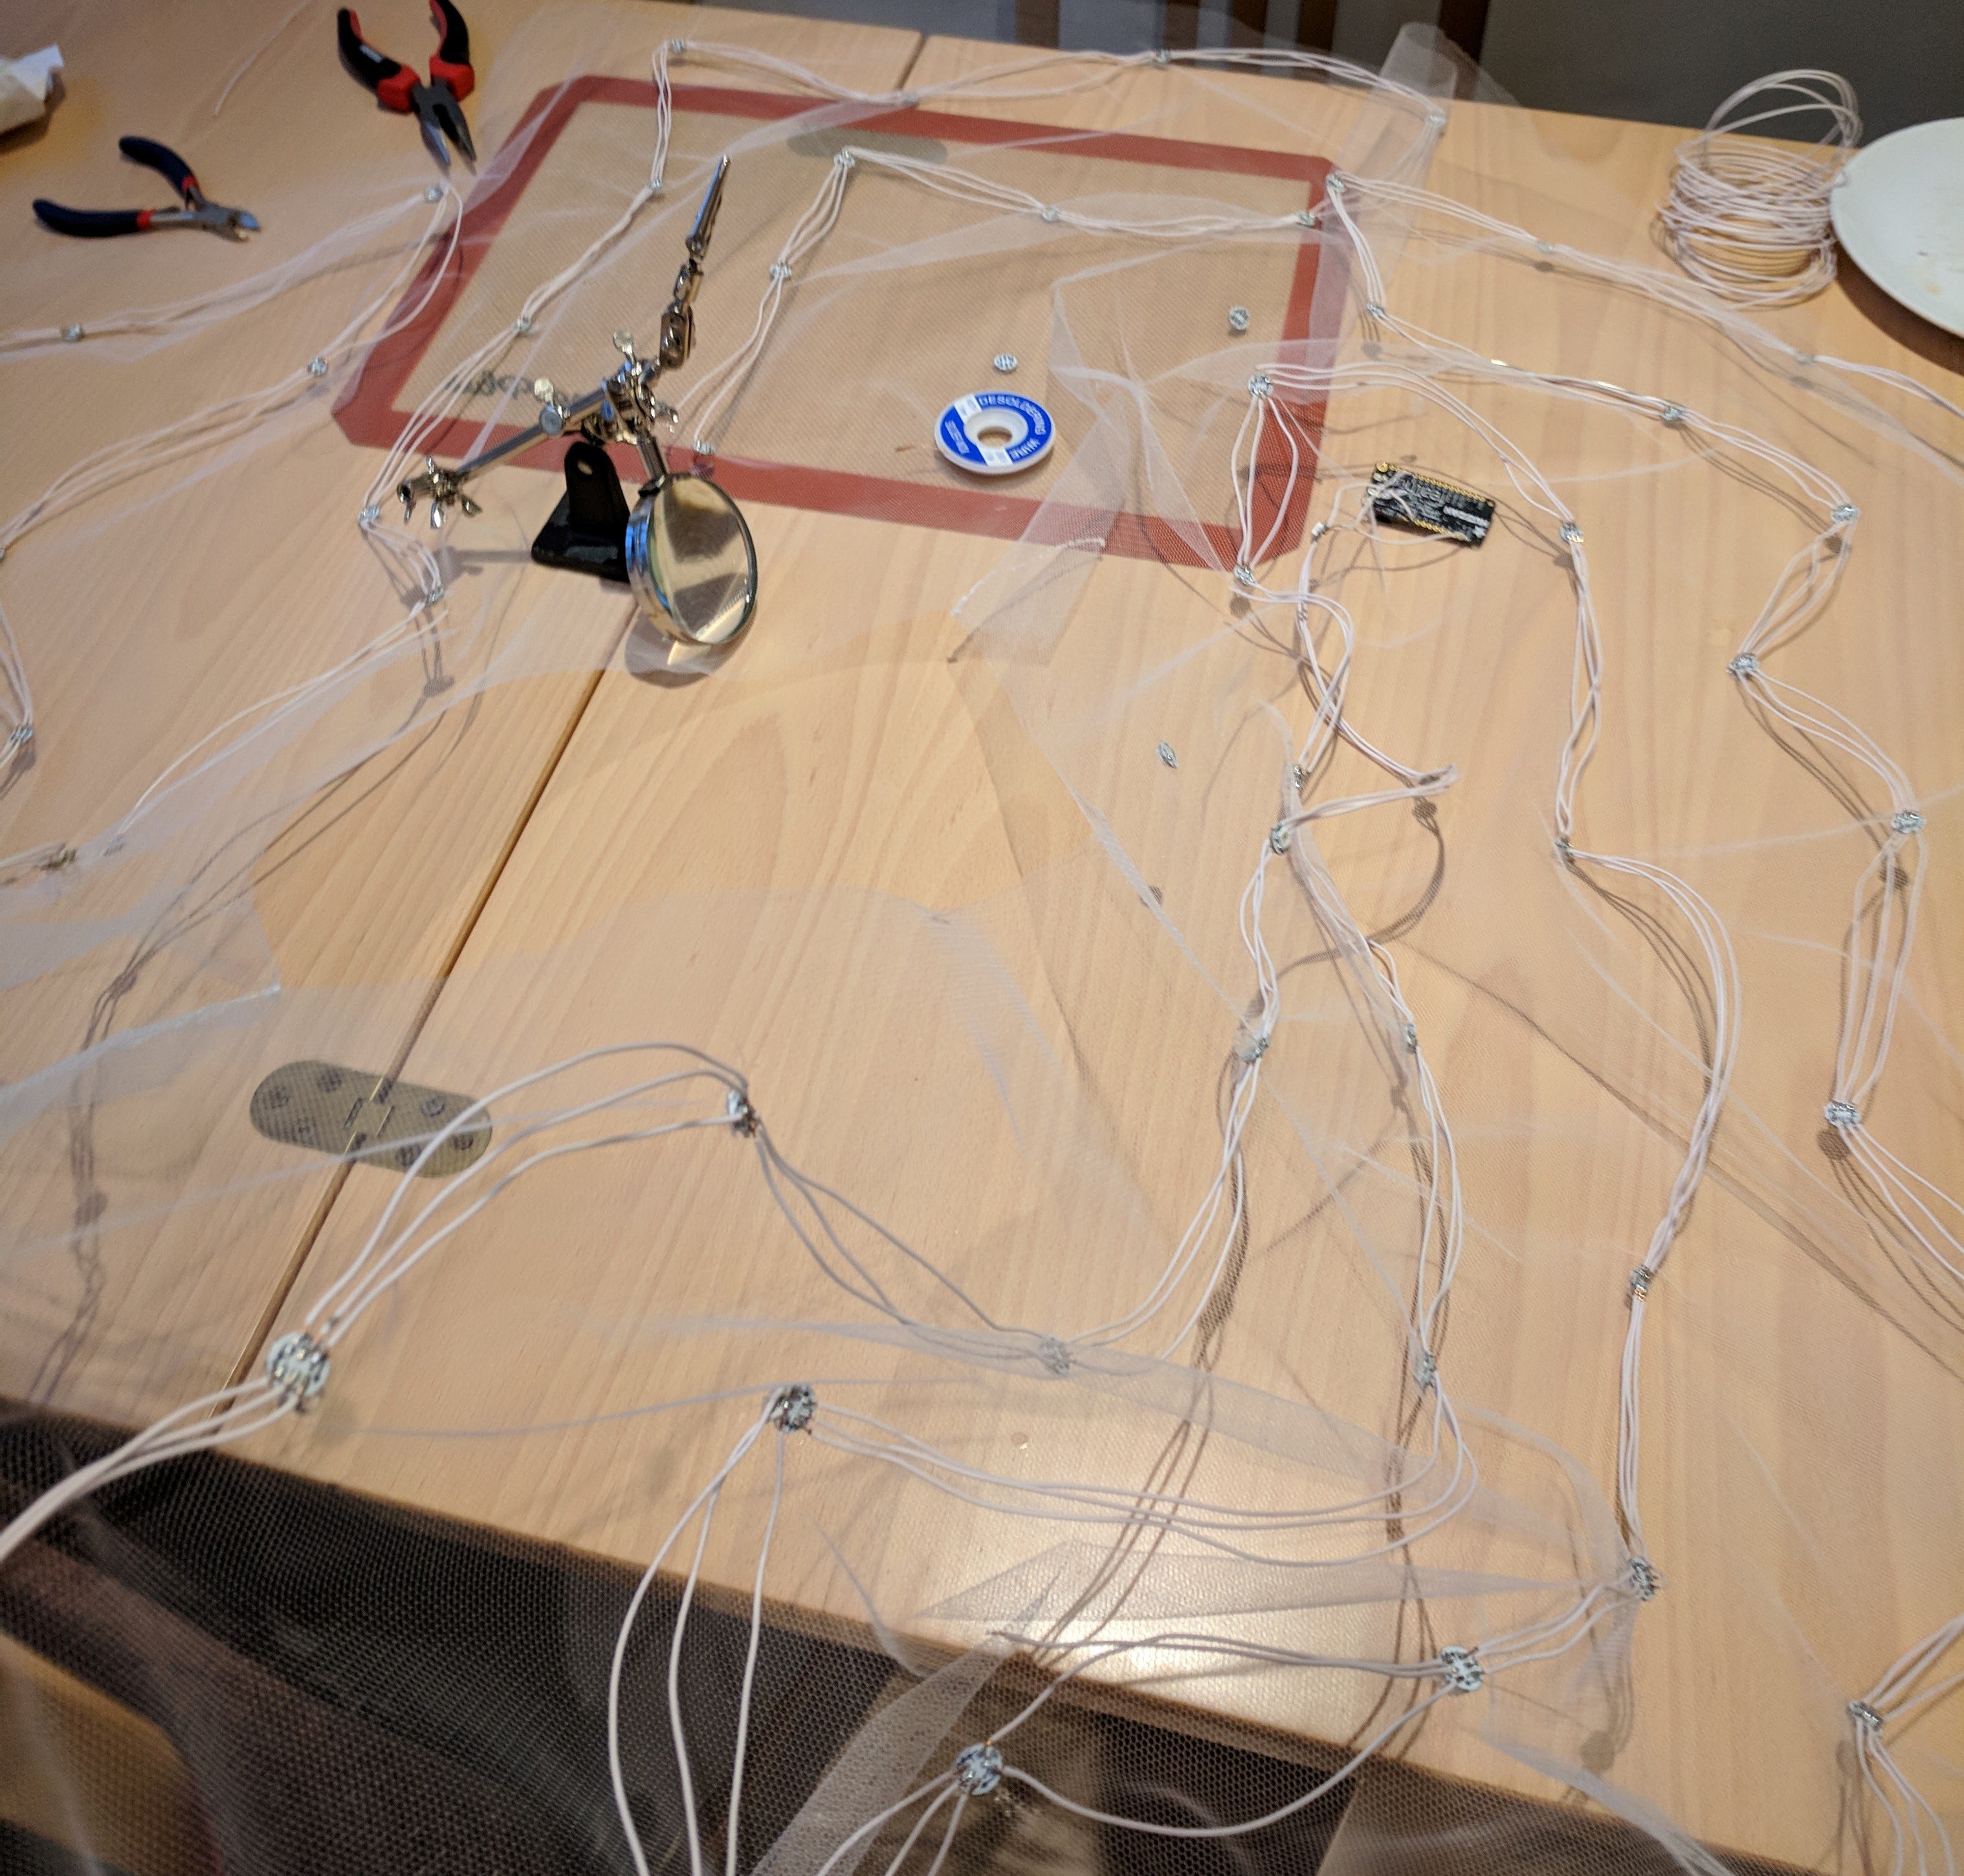
Once I had proved the concept and got a handful of LEDs working, I then had to take on the arduous task of gluing, soldering and sewing 100 LEDs into a dress. I decided to make a separate underskirt which I would attach the LEDs to and then would sew into the skirts of the dress. As I mentioned above, I didn’t want the layout of the LEDs to be too uniform so I gaily went ahead and hotglued 100 individual LED pixels onto a piece of netting in semi random layout.
 Gluing LEDs to an ‘underskirt’
This was a terrible idea, not only did I not think about the direction that I was sticking the LEDs in (making soldering them together a nightmare) but also, the hot glue melted as soon as I started to solder them together meaning that I essentially ended up gluing them all twice.
Lesson the first: do not use individual pixels, buy the pre-soldered ones
After all of the LEDs were glued I spent approximately 12 hour soldering them all together. Each LED needs 3 wires connecting it to the previous one and because i had stuck them at random intervals I had to measure the distance between each one and cut each piece of wire to fit the gap.
 Soldering the glued on LEDs together
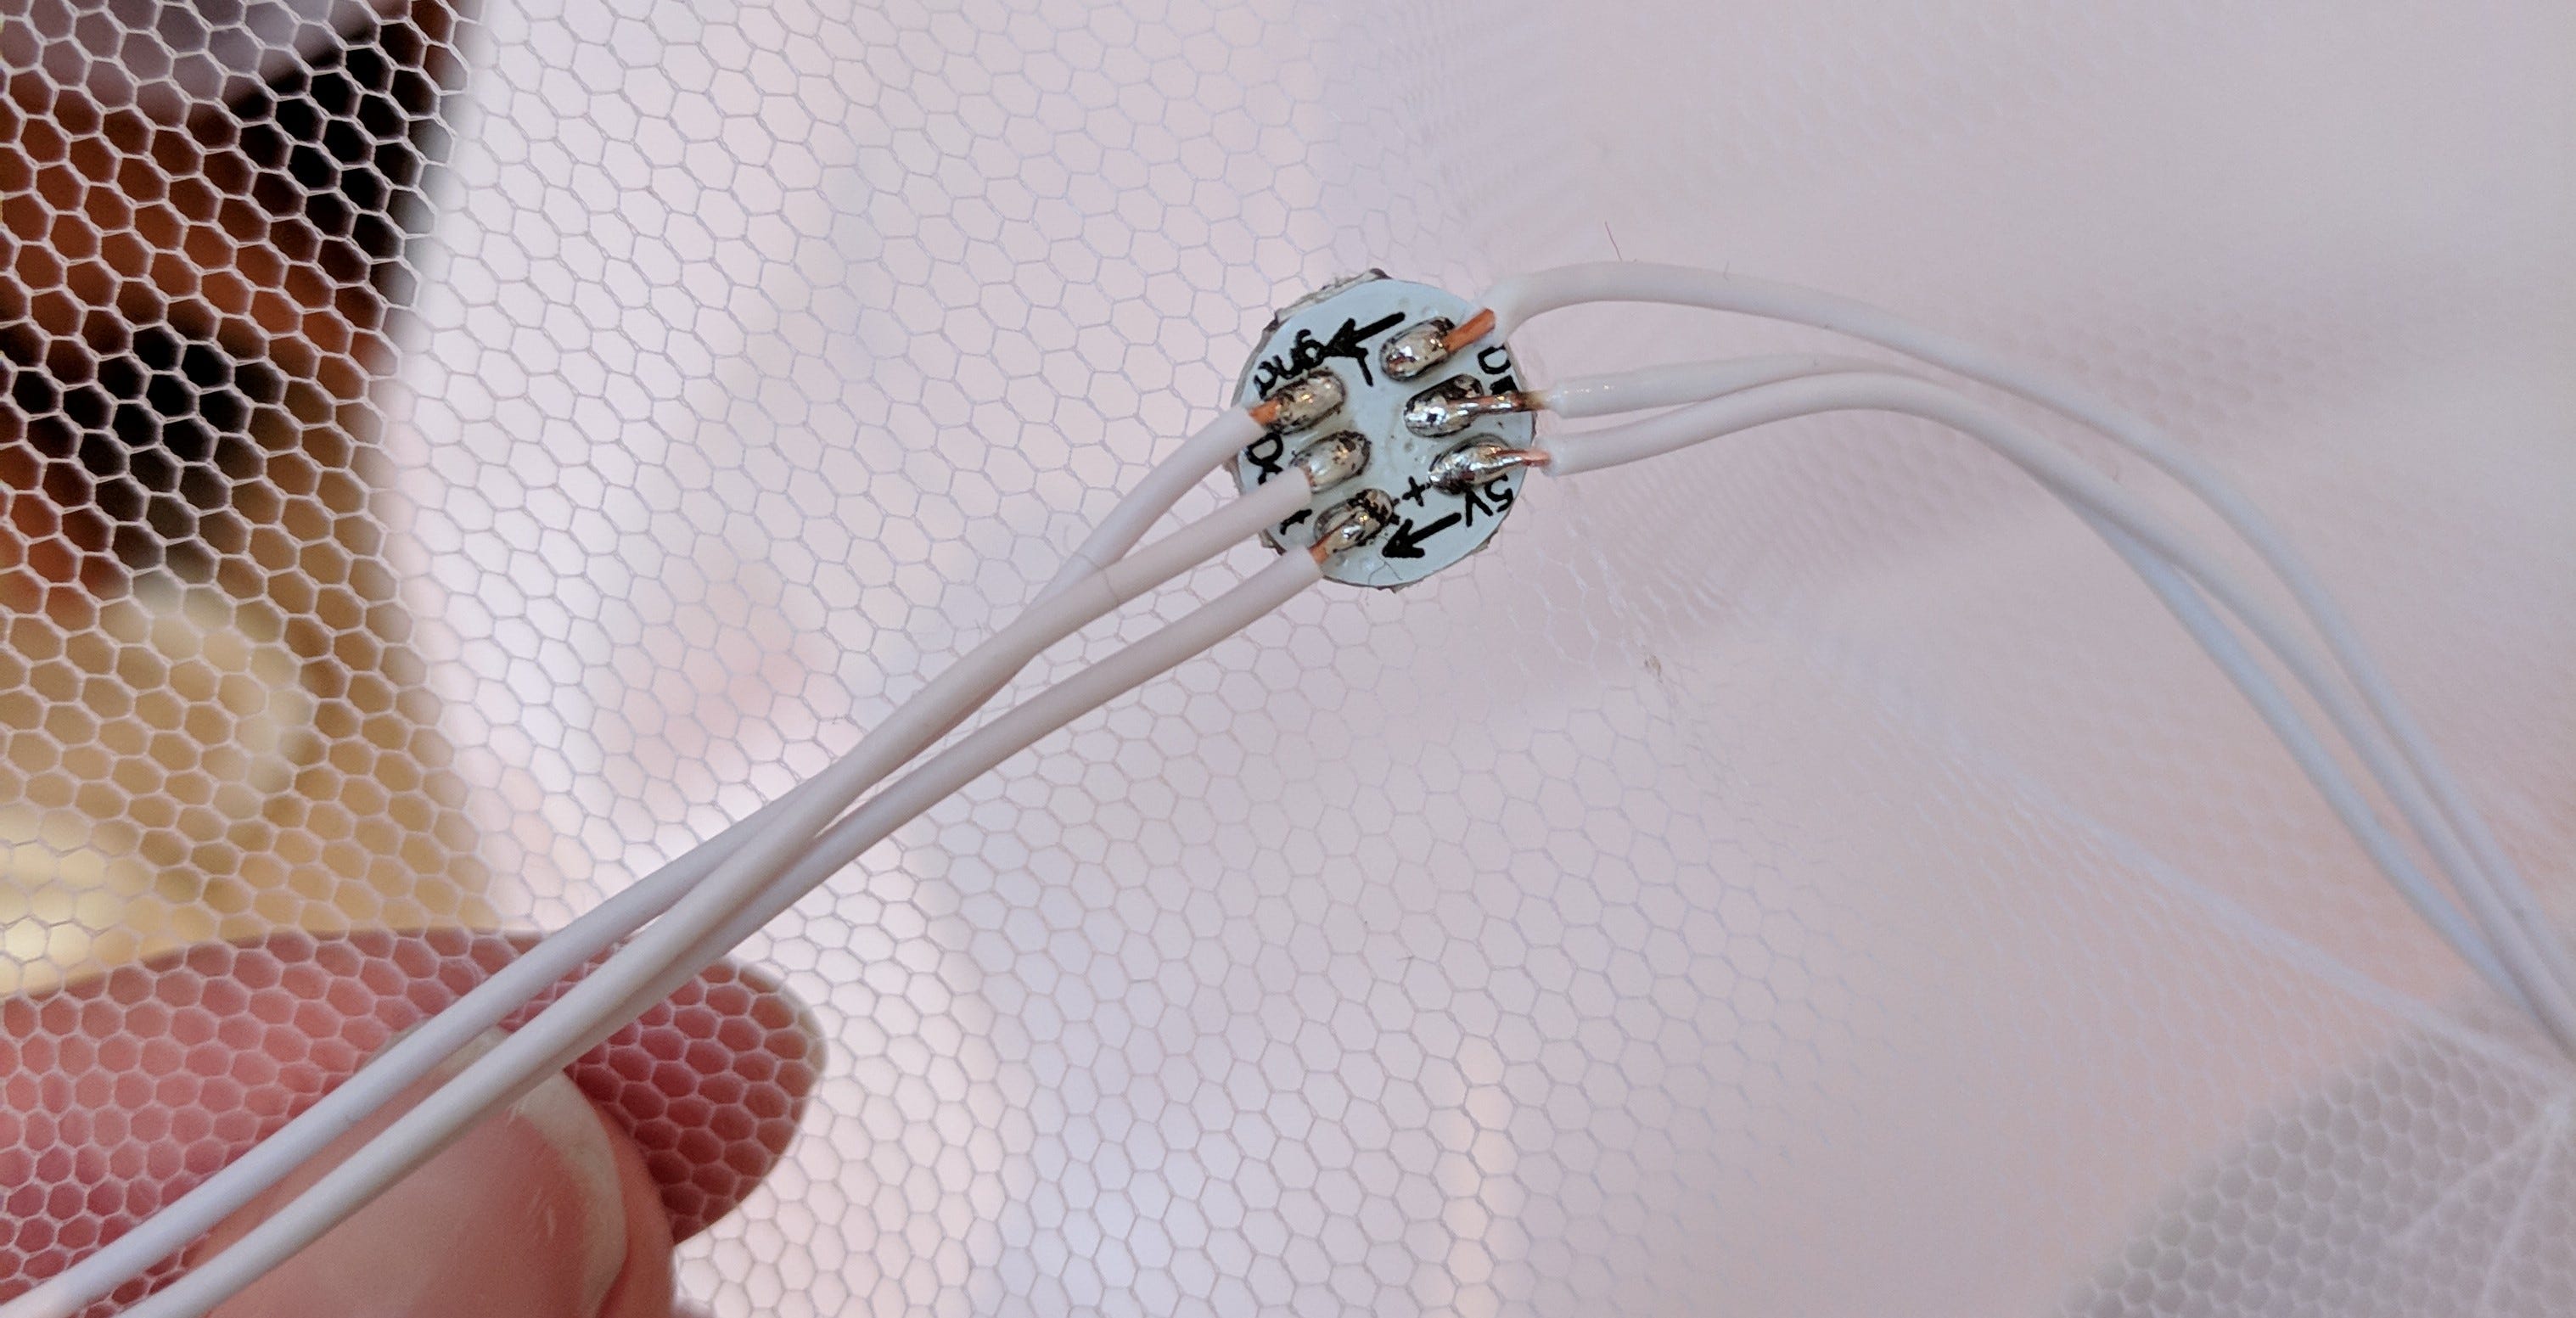 Close up of connected LED pixel
Lesson the second: Soldering irons slice through tulle netting like a hot knife through butter. Be careful how you wield that thing.
Once I had all of the LEDs soldered together I tested the skirt out and many of my solder points instantly snapped. After re-soldering the broken ones I then went over each one and coated the back in hot glue to try and reinforce the points.
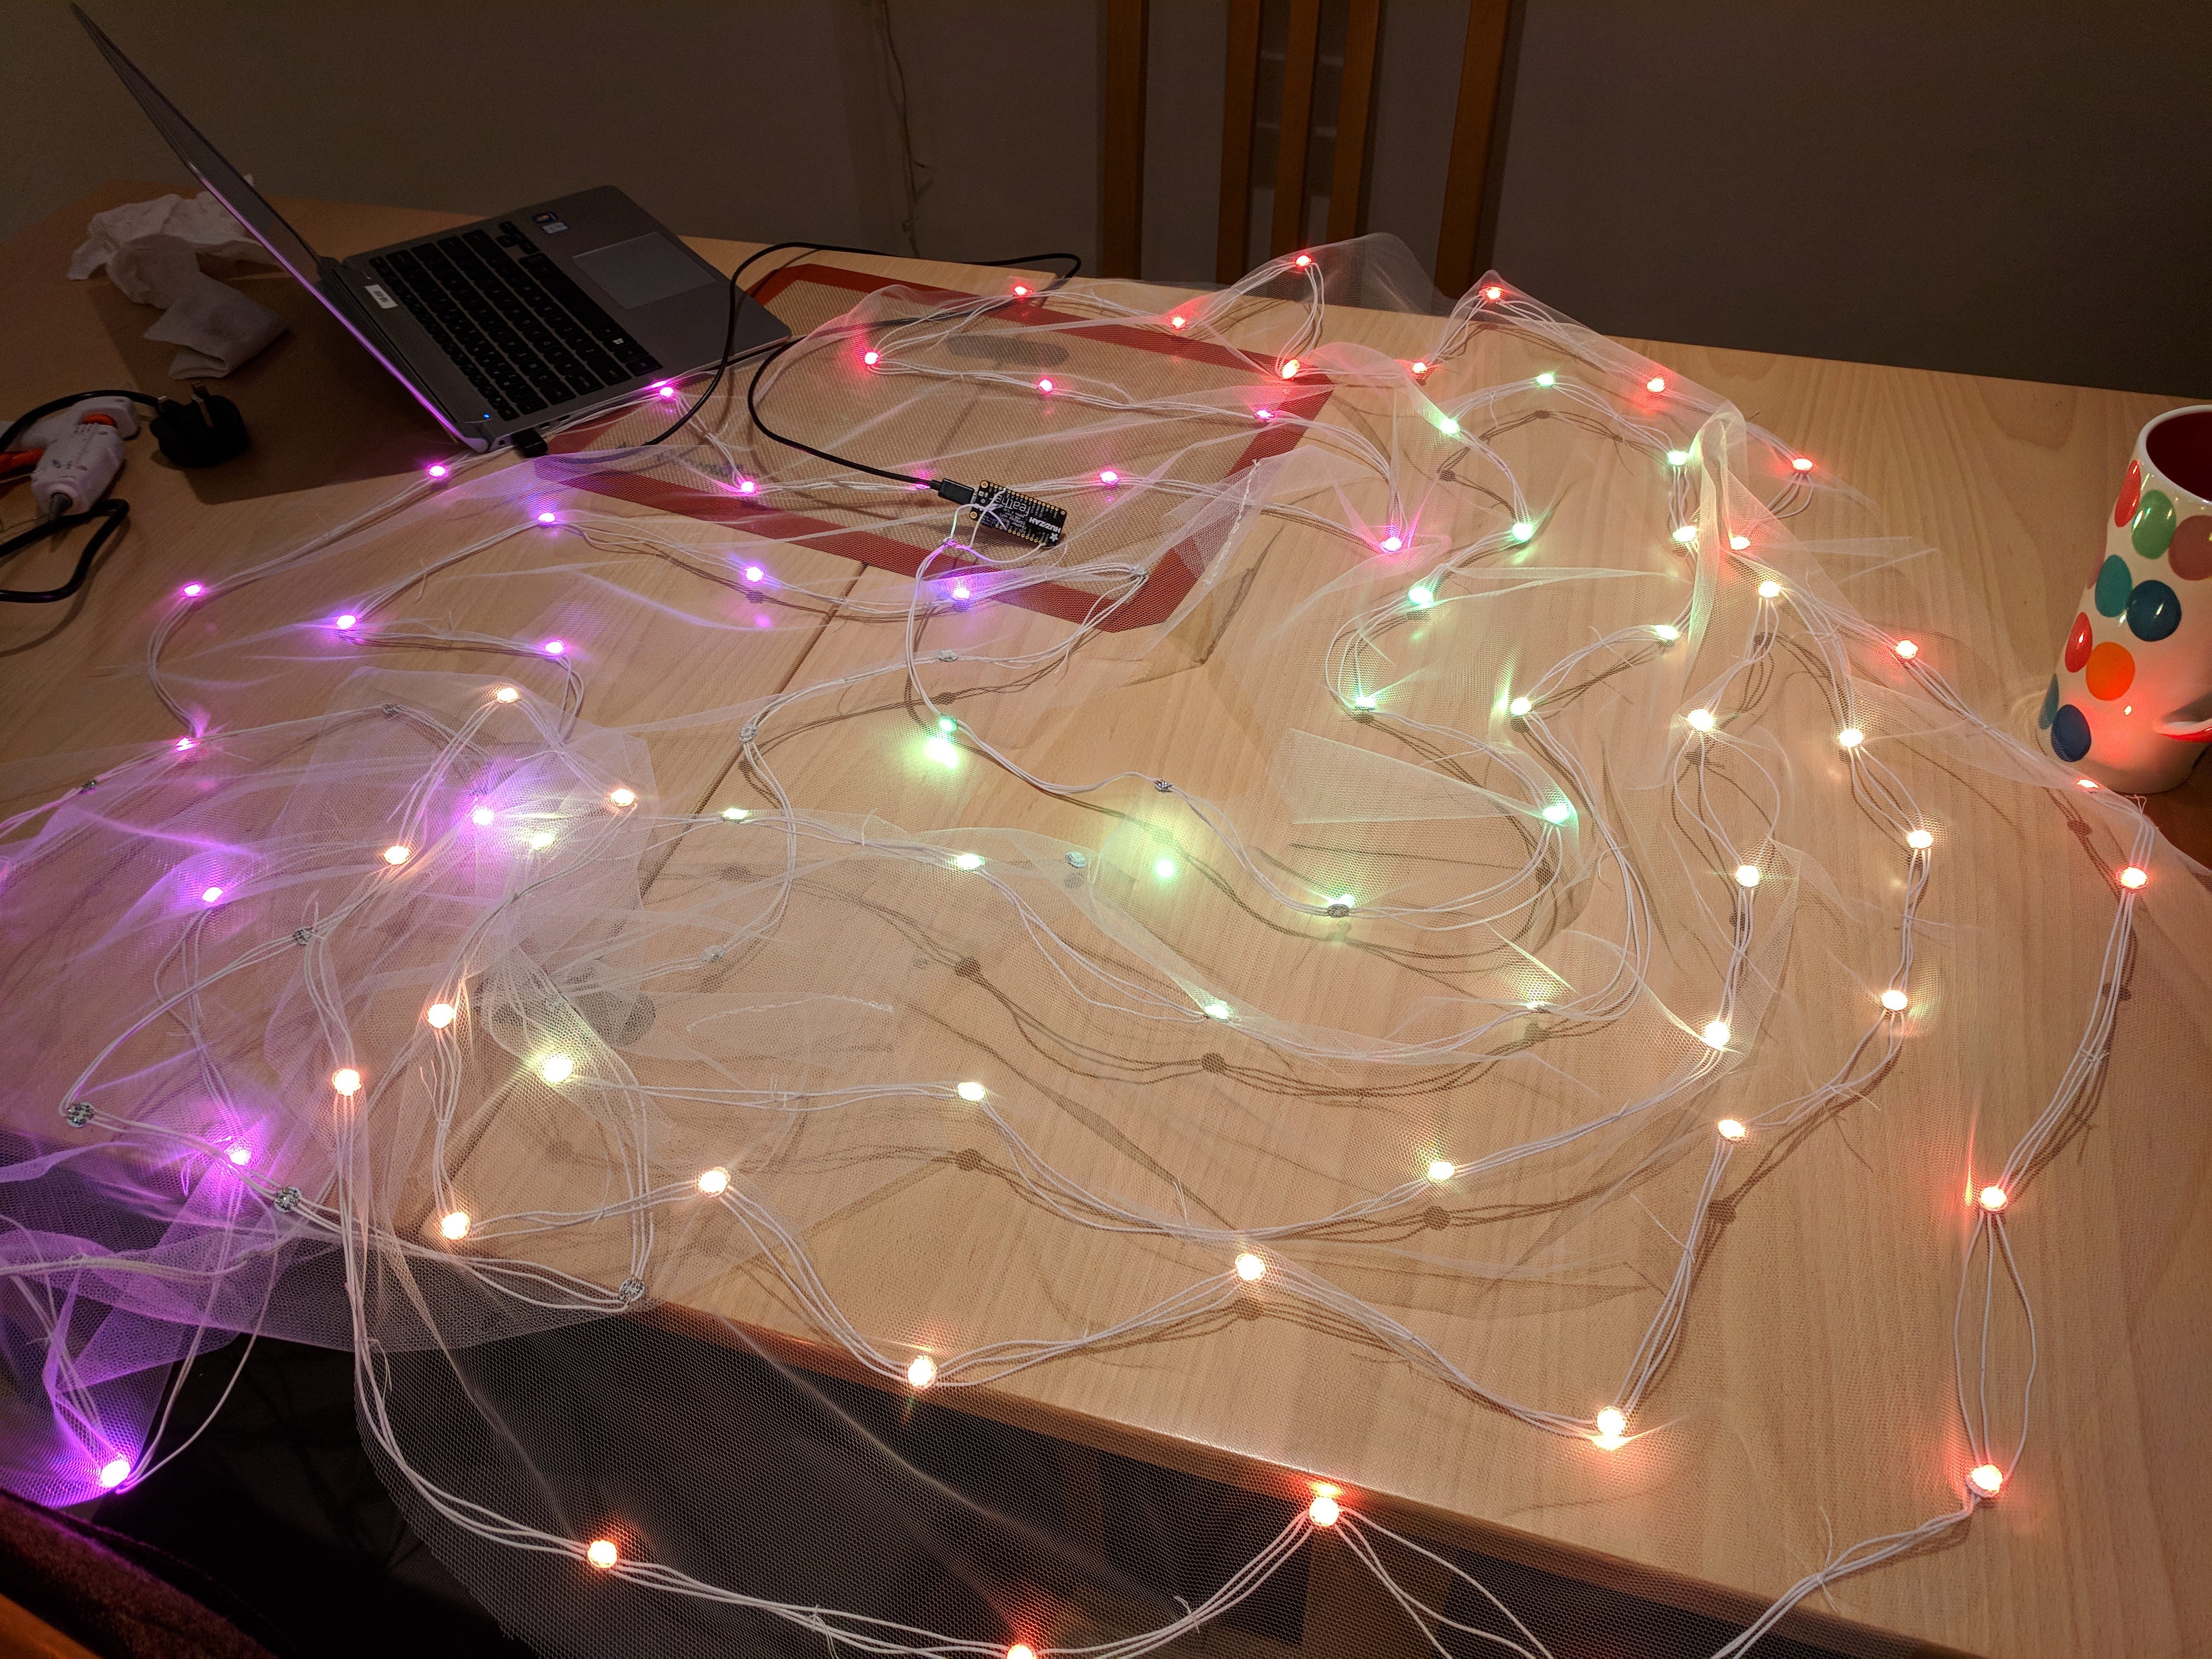 Testing out the connected up LEDs
Lesson the third: Seriously, do not use individual pixels, buy the pre-soldered ones. Hot glue the backs of those too if you’re going to dance in them, just in case.
Once I had the completed underskirt I then had to sew it into my wedding dress. I am not very good at sewing. Give me a soldering iron any day! This was definitely the most scary part of the whole project. I used a tacking stitch to sew it into the underskirts of the dress. I also had to cut a small hole into the lining of the dress to allow the USB cable to go from the board to the battery which would be secreted away in a pouch at my waist. Cutting a hole in your wedding dress is terrifying. If I had the skills I’d have made a buttonhole, as it was i just coated that thing in superglue to stop the hole from fraying.
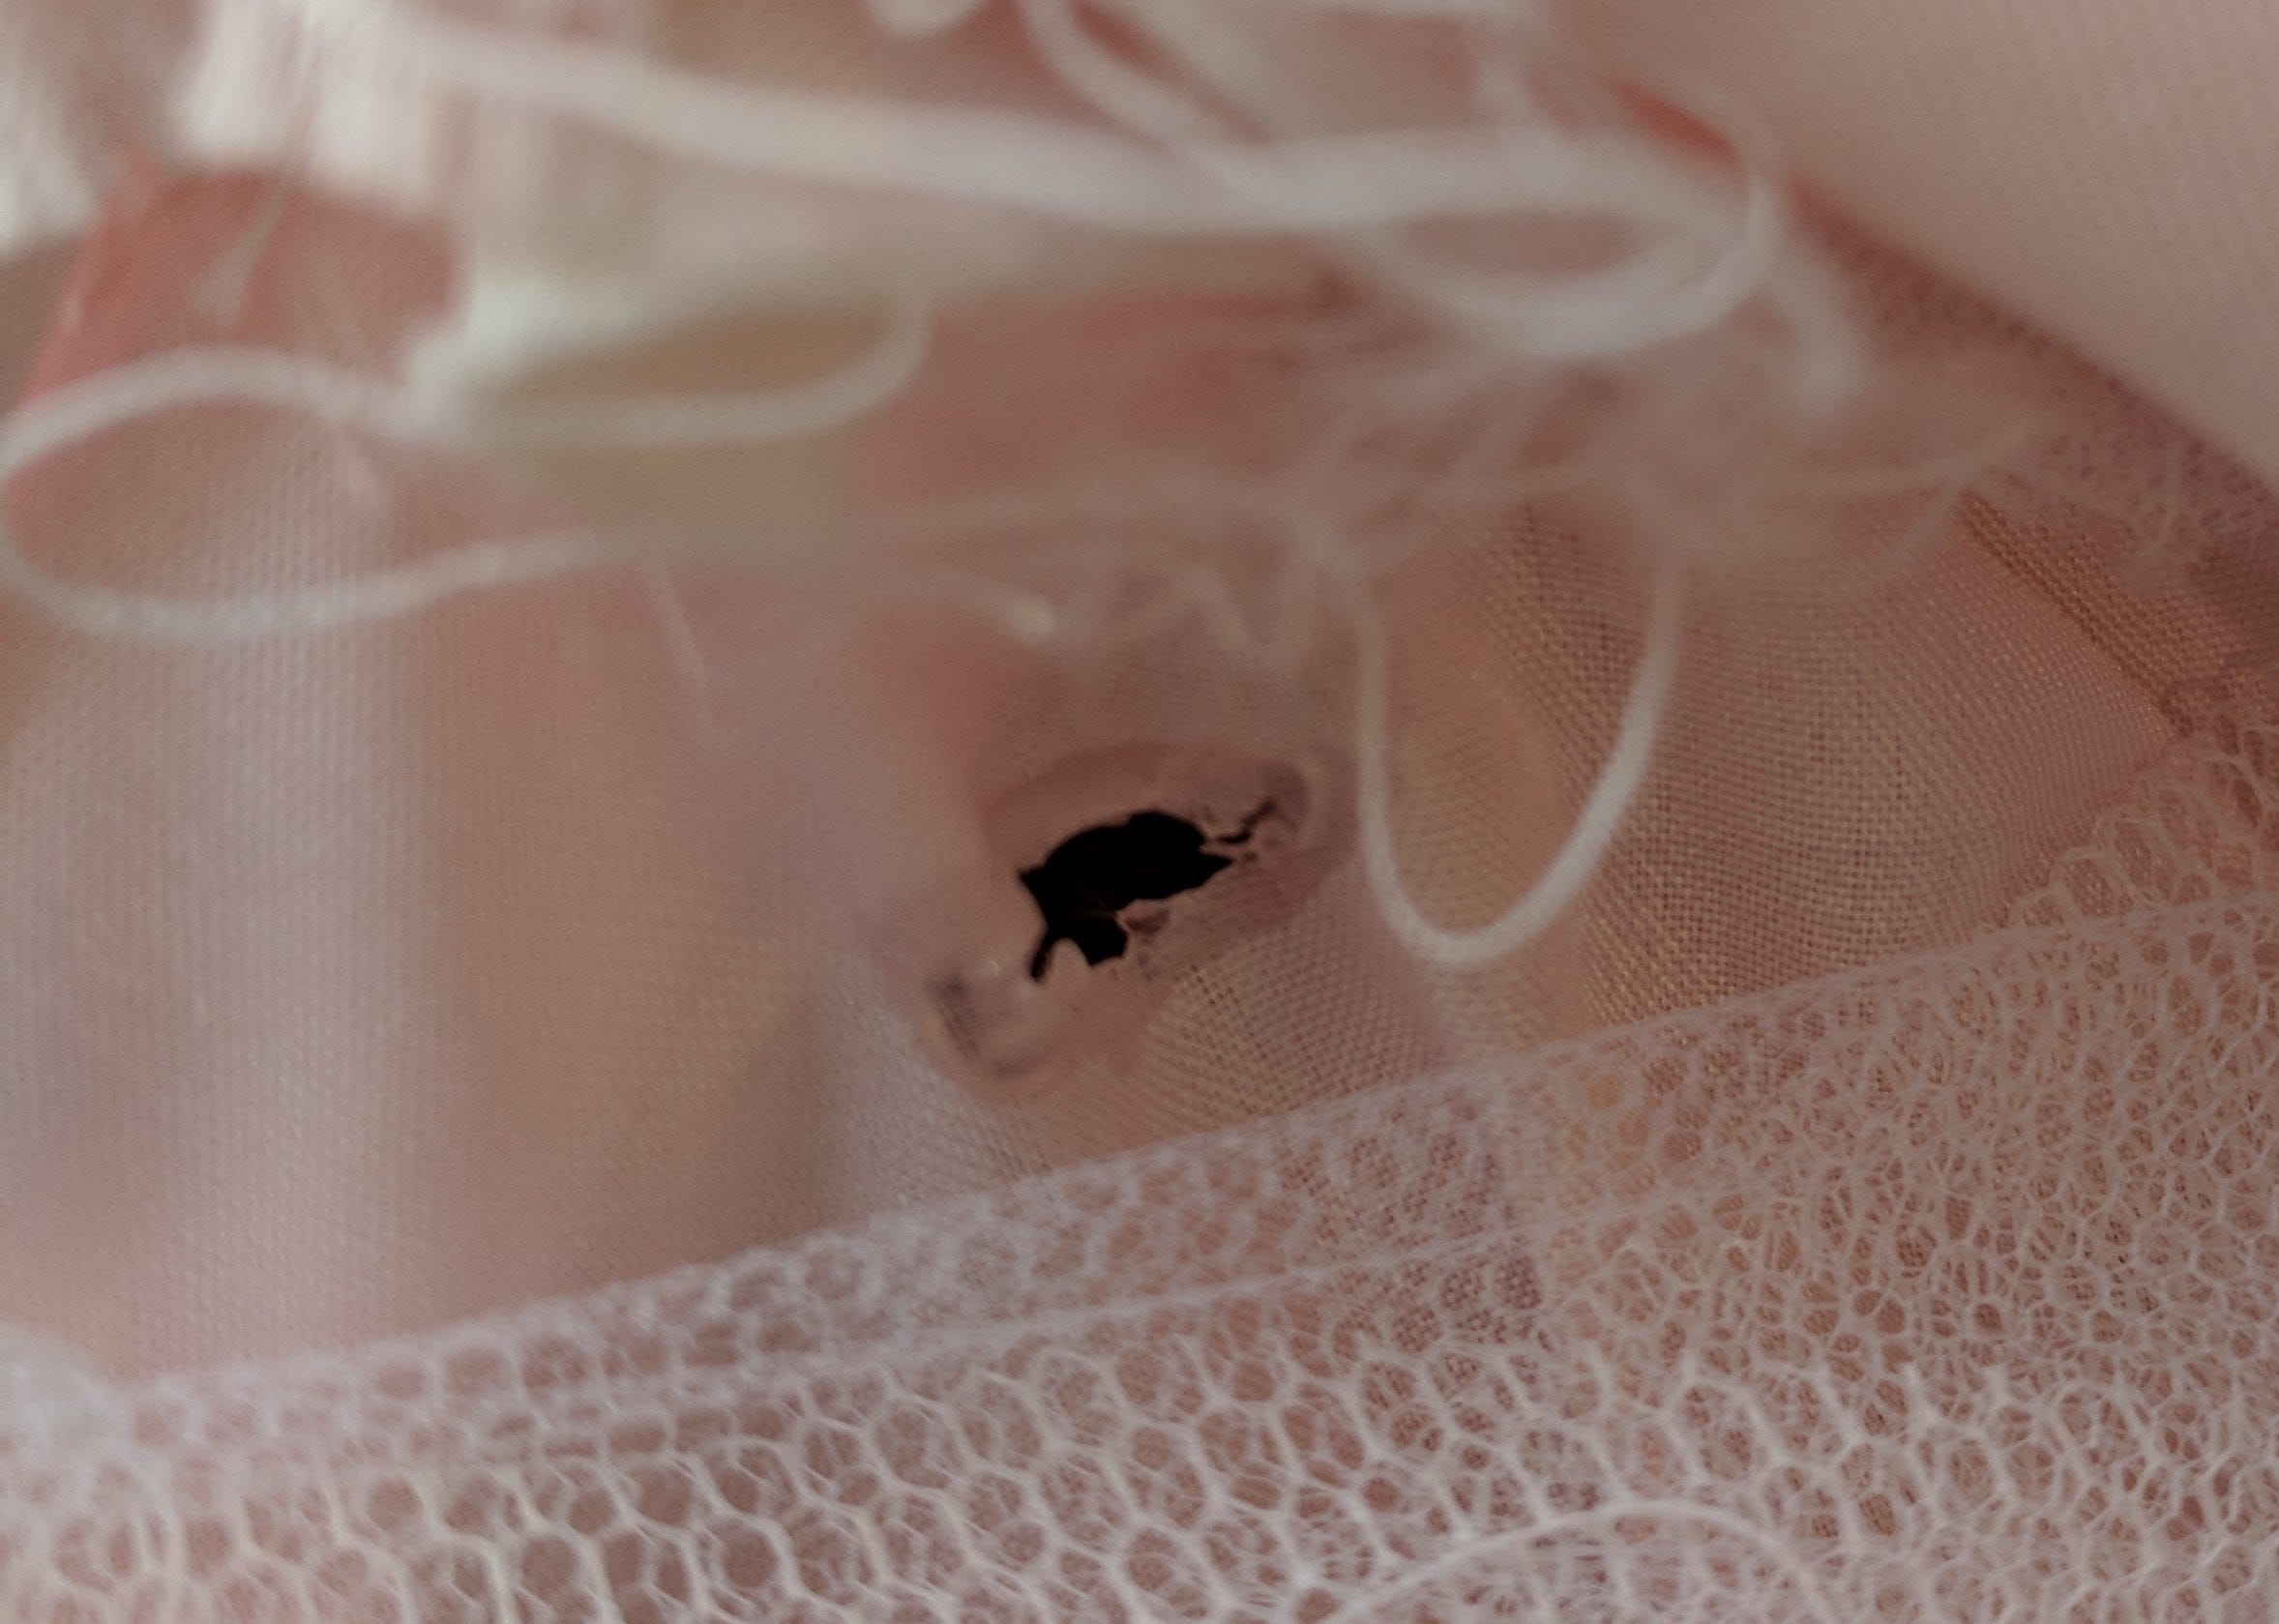 Just cutting a hole in my wedding dress, don’t mind me!
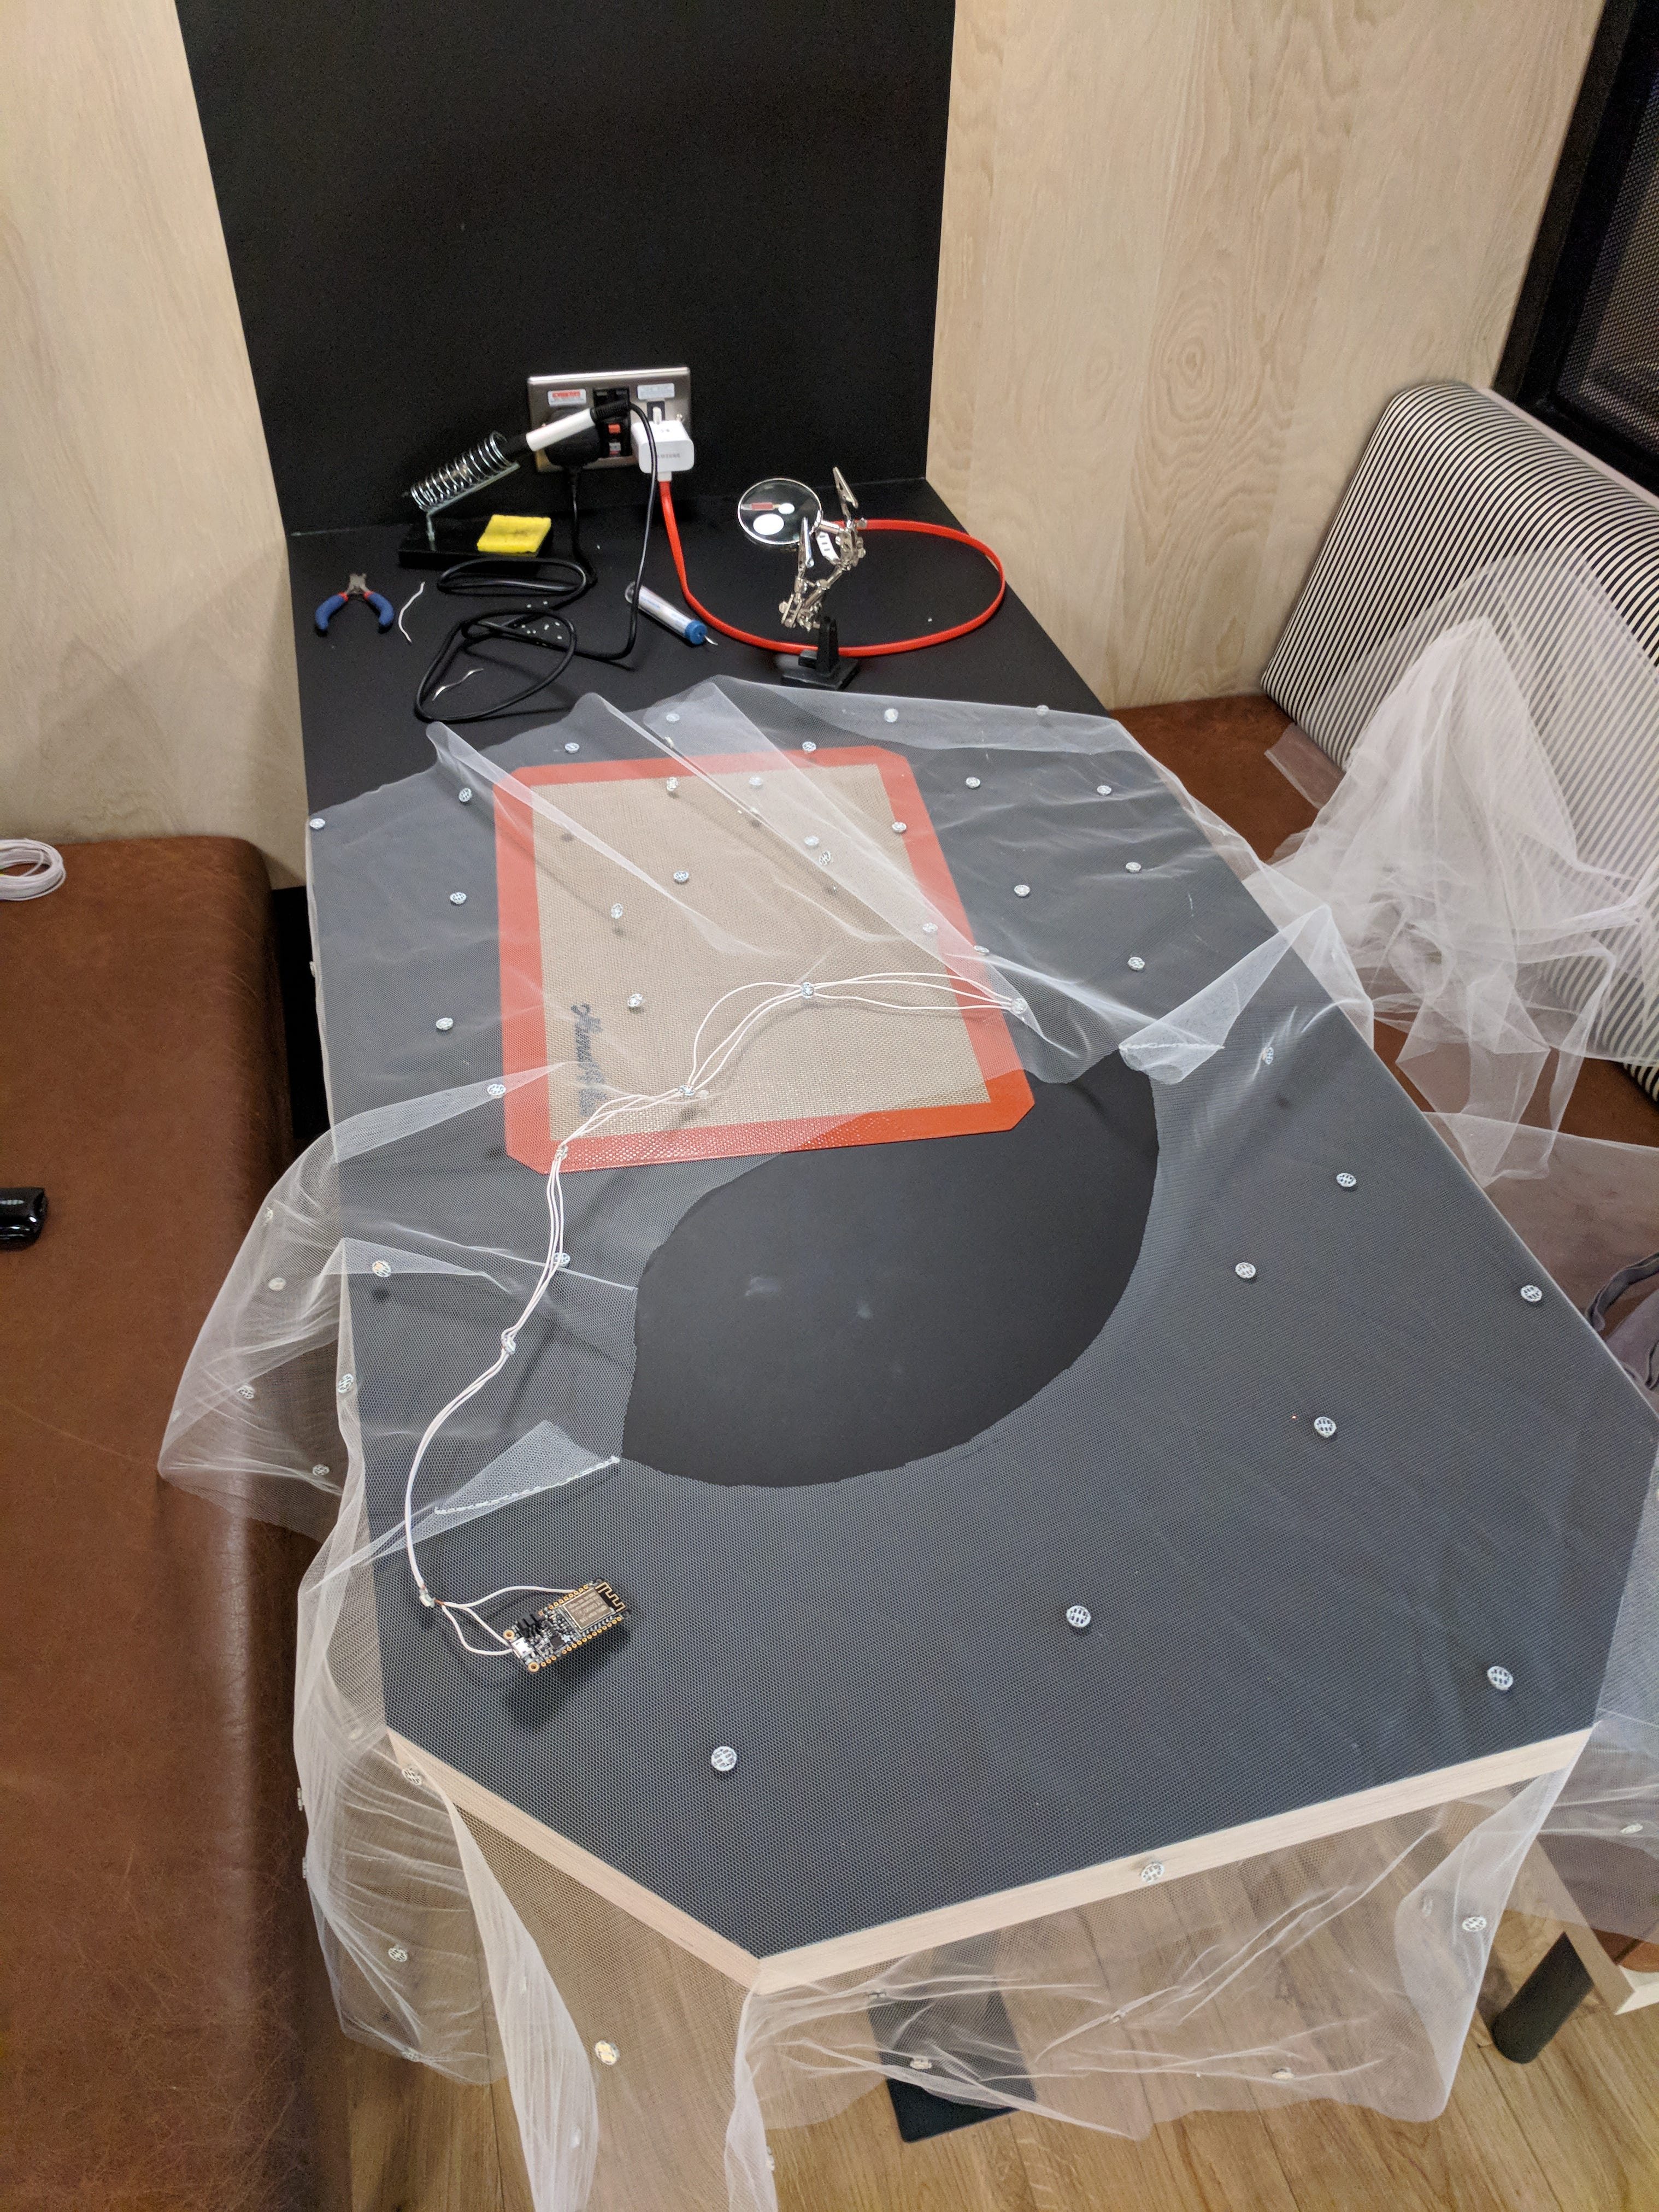
 Testing the lights in the dress
The Final Piece and What I Learnt
I was completely in love with the final piece. The tweeting worked, the rainbow secret setting worked, the tiny batteries was barely noticeable tucked into my Spanx™ and I was imagining myself walking back up the isle to gasps and a very surprised new husband. Best laid plans and all that, one of the connections broke on the way to the venue so the whole thing was in vain, but at least I got this one video!
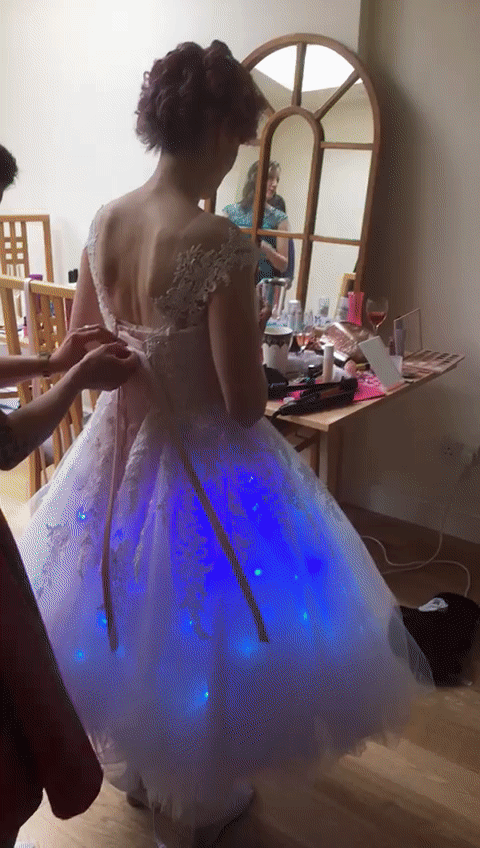 The final piece!
Buying the cheaper knockoff pixels also had it’s drawbacks, the first set that I bought for some reason the G and the B of the RGB values were reversed, so I had to give it an RBG() value. Took some debugging to find that one! The presoldered ones were slightly different too, and the string contained two different types of knockoff Pixels, so the colours varied slightly, creating a non uniform effect when set to a single colour.
This is by no means the end of the idea. I took my frustration at the broken dress and channelled it into starting over. I used pre-soldered LEDs, bought a tulle underskirt and set about making a version that I’ll be able to wear under any skirt, at any event! The dress will live again!
As I bumbled along in this journey of over-excitement, making things and burning myself on soldering irons and hot glue guns I received a lot of help and advice from many wonderful people. Thank you to everyone who helped me at SexTechHack, to Rachel “ Konichiwakitty” Wong for her encouragement to just get started, to Stephanie Nemeth for her advice on parts to buy (She also makes super awesome programmable LED wearables). To Jonty and Tom for giving me space and time to glue things to things (and for helpful advice along the lines of; ‘You’re definitely doing this the hard way’). Thanks to everyone on Twitter who answered my many questions and finally thanks to my fiancé who somehow didn’t realise what i was up to and was supportive and wonderful when it didn’t work anyway!
If any of this is helpful to you as you start on your own LED wearables project I’d love to hear about it, and if I can help in any way please do reach out to me @thisisjofrank on twitter. If you’ve suggestions for how I could improve the dress I’d love to hear those too!
By Jo Franchetti on July 13, 2018.