
WebVR, feasting in the round table.
Legend says that Graphical User Interfaces (GUIs) were developed in order make our interactions with command-line systems *so much* easier. In the early days, in a world where black screens, floppy disks and non-existent connectivity were the norm, menus, toolbars, buttons and ‘mice’ became kings and shared a place in the round table. But for those of us old enough to remember typing commands to ‘start’ the OS, and everyone that came after, the commoditization of those kings became paradigm, and the royalty wore off.
From here on, terms like ‘luna’, ‘aero’, ‘metro’, ‘aqua’, ‘compiz’, represented refinements GUIs had while maturing. Some aimed at being different. Some just aimed at being new. But none managed a change of paradigm for GUI interactions.
Right now we are in a point of inflection though, where wearable technology, IoT enabled devices and Virtual and Augmented Reality are proving to be a new way of making systems *so much more* natural to use — they are the new knights that sit at the round table in Camelot. It’s very exciting. It’s our turn as web developers to help shape a new paradigm for interaction and interfaces, and that is no small deed!
It’s our turn as web developers to help shape a new paradigm for interaction and interfaces, and that is no small deed!
(Web)VR, our Excalibur
You have probably heard about Virtual Reality. You might have tried a VR headset. You might even be the proud owner of a top-of-the-line VR system. That’s amazing. Stereoscopic 3D and VR as mediums captivate the user and provides a level of immersion that can change a GUI’s desirability, and it is different enough to trigger this new paradigm in user interaction. But VR requires knowledge in 3D modeling, movement tracking, UX, stereoscopy, matrix transformations, … and if we want to get a taste of VR development in a quick and easy way beforehand, or if you’re up for the fun of learning something new, fear not, we have VR on the web.
VR on the web can take several forms. We can completely build a virtual environment using WebGL, THREE.js or more recently A-Frame. They all consist of different abstraction layers that adapt to different scenarios. WebGL is the JavaScript API that enables 3D graphics rendering in the browser. THREE.js wraps WebGL in order to make it easier to use. A-Frame wraps THREE.js to give it structure and allows bridging the HTML and VR worlds. It even features the JavaScript API known as WebVR. This API specification provides access to VR devices, and exists currently as an editor’s draft by a W3C community group.
I’ve recently being playing around with the idea of getting GUIs in a virtual space, by using A-Frame to re-imagine legacy controls in VR. The reason for choosing A-Frame is because it takes care of all the different elements that are needed for VR, and lets us focus on building our experiences/applications/games/compositions. It adds the WebVR polyfill if required, and sets scene, camera, lights and even move controls.
We will explore how easy it is to get up and running and creating our GUI components. First, a quick overview of A-Frame, then a splash of Lady Ada King’s magic touch and now we are ready to go.
Legacy Button Re-Imagined
While much deliberation is required to tackle depth in UIs, (and stay tuned… that is something we will be doing in the near future) this exercise will teach us about the basics of building WebVR apps using A-Frame. As we know, A-Frame is based in a Entity-Component-System pattern. If you’ve used Unity in the past, it’s very similar — if you haven’t, it’s very easy! Basically there is a scene, which has elements. These elements or ‘entities’ can have components attached that can specify looks, behavior, or actions.
<!doctype html>
<html>
<head>
    <script src='js/aframe.min.js'></script>
</head>
<body>
    <a-scene>
        <!\-\- entities go here! -->
    </a-scene>
</body>
</html>
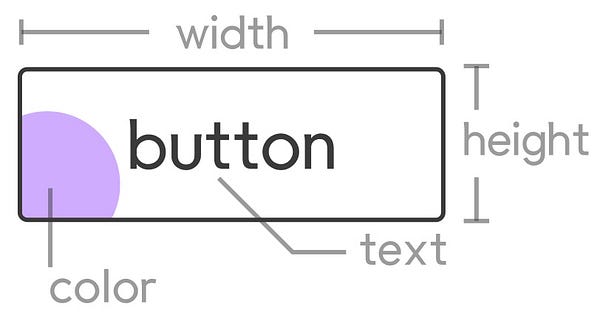
We are going to initially create a basic button.What goes into envisioning a button? Lets define it as an entity that will need to have width, height, depth, a background and foreground color, and of course the label itself. It will need to react as well to the ‘click’ event, since it is the basic functionality we expect from buttons — we will add more functionality to the button in a future post though.
The beauty of A-Frame is that we can take as a starting point the previous html code that only features the reference to the A-Frame script and an <a-scene> tag in the body. Nothing else required. Inside this <a-scene> we will have <a-entity>s that will have components. Lets think about what we need next. This will give us a clue on what components we should create (or reuse).
- Creating the ‘body’ of the button: We could use an A-Frame primitive (<a-box>), but for the fun of learning we will build our own box using THREEjs.
- Creating the label of the button: We can either use an existing component like the bmfont-text component or manually create a THREE.TextGeometry as well.
- Assigning the user defined parameters to our entity: done by registering our components as a primitive to be easily used in A-Frame.
In order to compose our button, we can start with the body by taking advantage of an existing geometry in A-Frame, the a-box. Since there already is a prebuilt box, we will register a primitive that makes use of it. Notice that to register a primitive we need a name, we need to know which are the default components that will compose it and we need to define mappings from the HTML attributes to the inner components. Not to worry, it’s easier than it looks.
//button primitive
AFRAME.registerPrimitive(‘a-svrbutton’, {
defaultComponents: {
geometry: {
primitive:’box’,
height:1.5,
depth:0.2,
width:3.5
},
material: {
opacity:1.0,
transparent:true,
side:’Double’,
color:’#8450ff’
}
},
mappings:{
//mappings go here!
});
In the previous snippet we can see that we are using geometry and material components. These take care of the body of the button and the color or texture. We can see as well that each component defines it’s inner attributes, this way the default values for the box that will be created are 3.5x1.5x0.2, and that it will be colored with a fully opaque beautiful Samsung-Internet-purple!
mappings:{
height:’geometry.height’,
width:’geometry.width’,
depth:’geometry.depth’,
color:’material.color’,
opacity:’material.opacity’
}
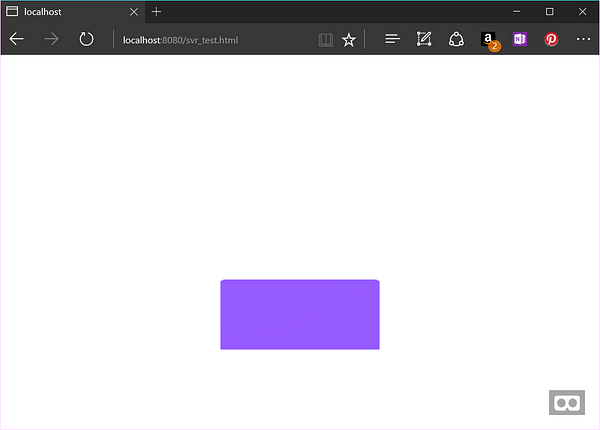
Mappings define where the HTML attributes and values of our primitive will correspond in the inner components. This way, when we type a specific value for height in the HTML tag of our primitive, it will be mapped to the height attribute of the inner box geometry, if we specify a different color or opacity it will be mapped to the color and opacity values of the material, and so on. If we now add the a-svrbutton tag in between the a-scene tags, we can see how very easily, with just 2 components, we’ve been able to create the body of our button!
<!doctype html>
Text: the evil nephew Mordred
Everything is straightforward until now. But foes appear and we must rise up to the challenge. For anyone working with WebGL or any of its wrappers (THREEjs, A-Frame,…), it’s not a surprise that text is a complicated subject. We will make use of the bmfont-text (this requires importing the js file) and we will create an additional custom component. This component will work as a helper to position the label and to allow changing the size of the text, as well as offset and position. Remember that components modify looks and behavior, so it’s not odd to think of developing a component to aid in this task.
To add the label, we must append a new default component to our defined primitive.
//text component for button label
‘bmfont-text’:{
text:’button’,
color: ‘white’,
align: ‘left’,
},
btntweaks: {
textposition: ‘0 0 0.5’,
textscale: ‘4 4 1’,
textoffset: 0.2
}
//new mapping for text
text: ‘bmfont-text.text’
Regarding the helper component, we will register a new component named ‘btntweaks’ to do exactly that: tweak our button to the max!
//svrbutton helper
AFRAME.registerComponent(‘btntweaks’, {
schema: {
textposition: {
type: ‘vec3’,
default:’0, 0, 0.5’
},
textscale:{
type:’vec3’,
default: ‘4, 4, 1’
},
textoffset:{
type:’number’,
default:0.2
}
},
tick: function () {
if(!this.text ||this.text !== this.el.getObject3D(‘bmfont-text’)){
this.text = this.el.getObject3D(‘bmfont-text’);
if(this.text) {
this.text.position.copy(this.data.textposition);
this.text.scale.multiply(this.data.textscale);
this.el.object3D.children[0].geometry.computeBoundingBox();
var text_bbox =
this.el.object3D.children[0].geometry.boundingBox;
var distCenter = (text_bbox[‘max’].x - text_bbox[‘min’].x)/2;
this.text.translateX(distCenter + this.data.textoffset);
}
}
}
});
Registering a component consists of defining a schema and optionally a set of functions to work with this schema. The schema tells us which attributes this component has and allows to define defaults (like textposition, textscale and textoffset). We now define the tick method, one of the lifecycle methods of a component, in order to set the scale and position of the button’s label. With this new component, we add to the primitive these other mappings related to the btntweak component:
//new mappings for text tweaking
textoffset: ‘btnTweaks.textoffset’,
textposition: ‘btnTweaks.textposition’,
textscale: ‘btnTweaks.textscale’
With just this code we can add the svrbutton to our previous html file, just between the a-scene tags:
<a-svrbutton position=”0 0 -5” text=”hola” material=”color:#14C767” btntweaks=”textoffset:-1”” ></a-svrbutton>
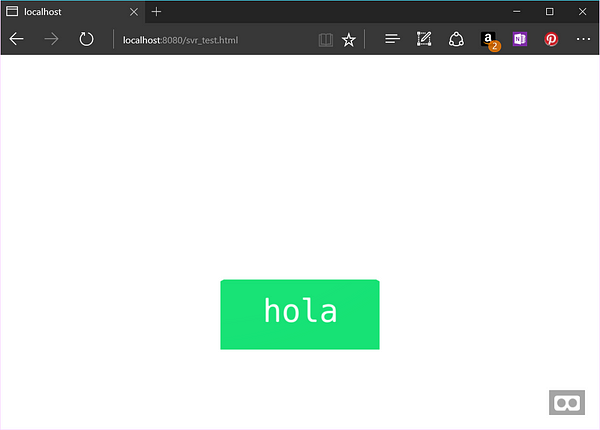
This line of code creates a button entity by defining and configuring the inner components with the values specified in the HTML as attributes. Notice the components: position, text, material and btntweaks.
The button is looking good, and now we must add the final piece, which is to allow this button to support click. We’ve gone through the hardest part of our learning journey, so it all rolls down the hill from here.
Magic Interactions, like if Merlin was a button
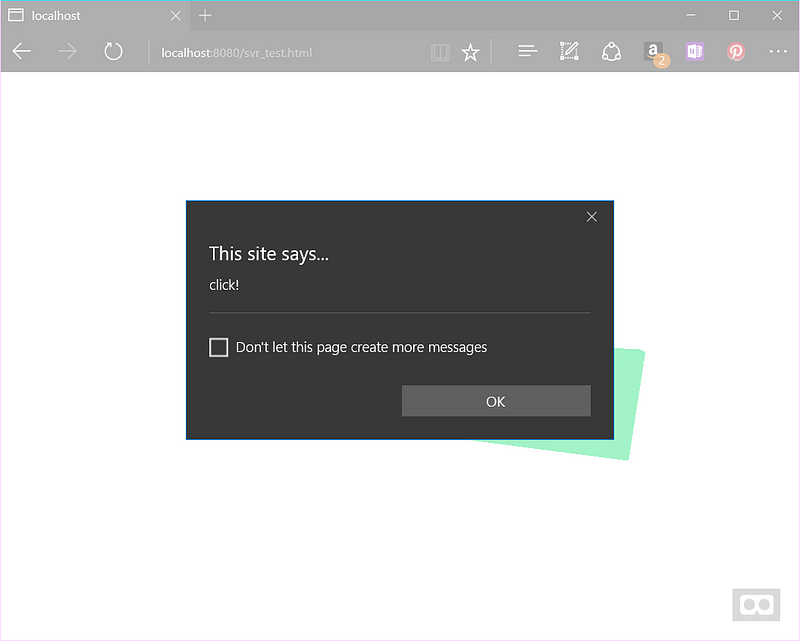
Click. It should be just as easy as a click. And it is. Part of the benefits of using A-Frame is that you can click or ‘fuse’ (clicking by starring for a short amount of time at something) by simply adding the event as you would in JavaScript. Either attach the event handler or just specify it in the tag. However, in order to know where you are clicking, we first need to add a cursor, which in A-Frame goes attached into the camera. So we add them to our scene and then then with a simple ‘onclick’ attribute we are ready to go. Just like magic.
//adding the camera to the scene
//our final button with the click event attached
<a-svrbutton position=”0 0 -5” text=”hola” material=”color:#14C767” btntweaks=”textoffset:-1” onclick=”alert(‘You’ve just clicked in VR!’);” ></a-svrbutton>
Camelot needs us.
With very few lines of code and reusing components we have managed to create a full VR test app that has a button and even supports clicks. This is encouraging —This is real courage! We as web developers can now explore and help shape the VR world. Let’s get on it.
With this written, I will continue to envision GUI elements, dive into storytelling and work with developers (both web and content) to try to understand the new possibilities on the horizon. Special thanks to knights of the round table Ada and Peter for their help and patience.
Tagged in JavaScript, Web Development, Webvr, Virtual Reality, Virtual Reality Content
By Diego González on September 20, 2016.