Adding 3D Models to your Website
The DIY way
 do it yourself: add a 3D model to a web page using web components
When we start thinking about assets to include in our websites we run into the usual suspects. Images, fonts, videos and audio — if you’re on the edgier side. But we are in the dawn of a new type of immersive computing, where 3D models will become a typical asset we will be able to find on websites. We can already find great repositories of objects in sites like Remix3D (a favorite of mine) or Poly, and right now we will take a look at how to easily build — and incorporate — them into our websites.
TLDR;
-
Do it yourself mode: Instructions to build a Web Component that allows to include a 3D model into a website using BabylonJS.
-
Fast and easy: Go here to get the current component ready to insert a 3D model into your website with HTML!.
Tech we will use
We are going to build a web component. The idea is that we will have an HTML tag that will allow us to insert and configure some basic parameters to include a 3D model into a web page. For this we need Web Components, a 3D engine, and some promises.
Web Components
 Web Components logo
As a quick web components recap, we can create them with the help of [Custom Elements](https://developer.mozilla.org/en-US/docs/Web/Web_Components/Using_custom_elements), [Shadow DOM](https://developer.mozilla.org/en-US/docs/Web/Web_Components/Using_shadow_DOM) and [HTML templates](https://developer.mozilla.org/en-US/docs/Web/Web_Components/Using_templates_and_slots). For our example, we will be defining a Custom Element “model-3d” and using Shadow DOM to create the underlaying structure for the 3D model viewer. In a future post I will go over expanding the current shell and capabilities of the model viewer.
3D Engine

I have chosen *BabylonJS *as the 3D engine, and while it might be a bit overkill for such a simple component, I want to progressively bring new features to it. Also, the ease to create a default scene came handy, and was an interesting way of tip toeing into this engine (I’ve played around with ThreeJS and A-Frame in the past, and I’ve been curious for a while now on BabylonJS).
3D Model
 glTF format
There are many 3D model formats out there, but for my case, I’ll be using GLTF models. This is a format designed around the idea of efficient transmission and loading of 3D scenes and models by applications. Nonetheless, I am using internally (more on this later) a loader that can handle other formats like OBJ as well.
You can get objects to play around with from Microsoft’s Remix 3D, Google’s Poly or Sketchfab. You can create these type of objects by using Paint3D (comes in every version of Windows 10), Google Blocks, or scanning it with your 3D scanner of choice (you can use an Xbox Kinect to scan). I’ll must likely do a future post on how to aquire or create 3D content, since I am seeing there’s plenty to talk about in this section but I dont want to off rail the original conversation.
JS Promises
I got to play a bit with promises, which are objects that represent an eventful completion of an asynchronous operation, in order to handle the load of the BabylonJS scripts and the lifecycle of the component itself. If you are keen on reading about promises, I recommend this post by Jo Franchetti, which includes a good explanation and a great idea for a donut flavor #NutellaFilledRainbowSprinklesUnicornSupreme (Although I am more of a #DulceDeLeche person).
Putting it all together
When we bring these 4 technologies together we can make a new HTML tag to display the 3D model which can be used like so:
<model-3d background-color="#000000" src="/models/3Dmodel.glb"></model-3d>
Behind the scenes there will need to be a canvas with a webgl context though. The 3D scene that we are embedding would also require lighting, camera, and other settings in general. That’s where BabylonJS comes in, providing an easy way to set this up!
To use the BabylonJS, we need to add the scripts previously into the page. To use certain functionalities (like the ability to interact smoothly with touchscreens) we have to link up to three script files. We will save the user from having to do this manually by adding the files ourselves and setting the environment in a way that it displays the 3D model in the best way possible.
With this in mind, lets picture that what our web component should do is the following:
-
Include the required Babylon JS files.
-
Setup the 3D environment (setup the scene).
-
Load the 3D model into the scene.
-
Monitor any changes to attributes that might happen programmatically or in the HTML.
Let’s view these four steps one by one.
Include BabylonJS
This is a simple but tricky part. We will load the necessary scripts from the BabylonJS CDN but they need to be loaded before the Web Component itself loads. This is because the Web Component requires the BABYLON object to exist in order to create the engine that it will use to render. The Web Component will create the script(s), download them and add them to the head of the document. This way BabylonJS wil exist in the global scope of the page, and will be able to be used from the component. If you are using more than one file for BabylonJS, like using pep.js for pointer events, then make sure you specify that they should load synchronously to avoid them loading before babylon.js is ready.
const bjs = document.createElement('script');
bjs.src = 'https://cdn.babylonjs.com/babylon.js';
**bjs.async = false;**
document.head.appendChild(bjs);
Another thing to have in mind is that if we will provide the parameters to background color and source to the model in the HTML tag, these will trigger the attributeChangedCallback before the BabylonJS files have finished loading. An easy and educational way of solving this is by using Promises. We can wait until BabylonJS is ready to then proceed to load the 3D model and set the background color of the scene as stated by these arguments. We will discuss a bit more on these observed attributes further on.
Setup 3D Environment
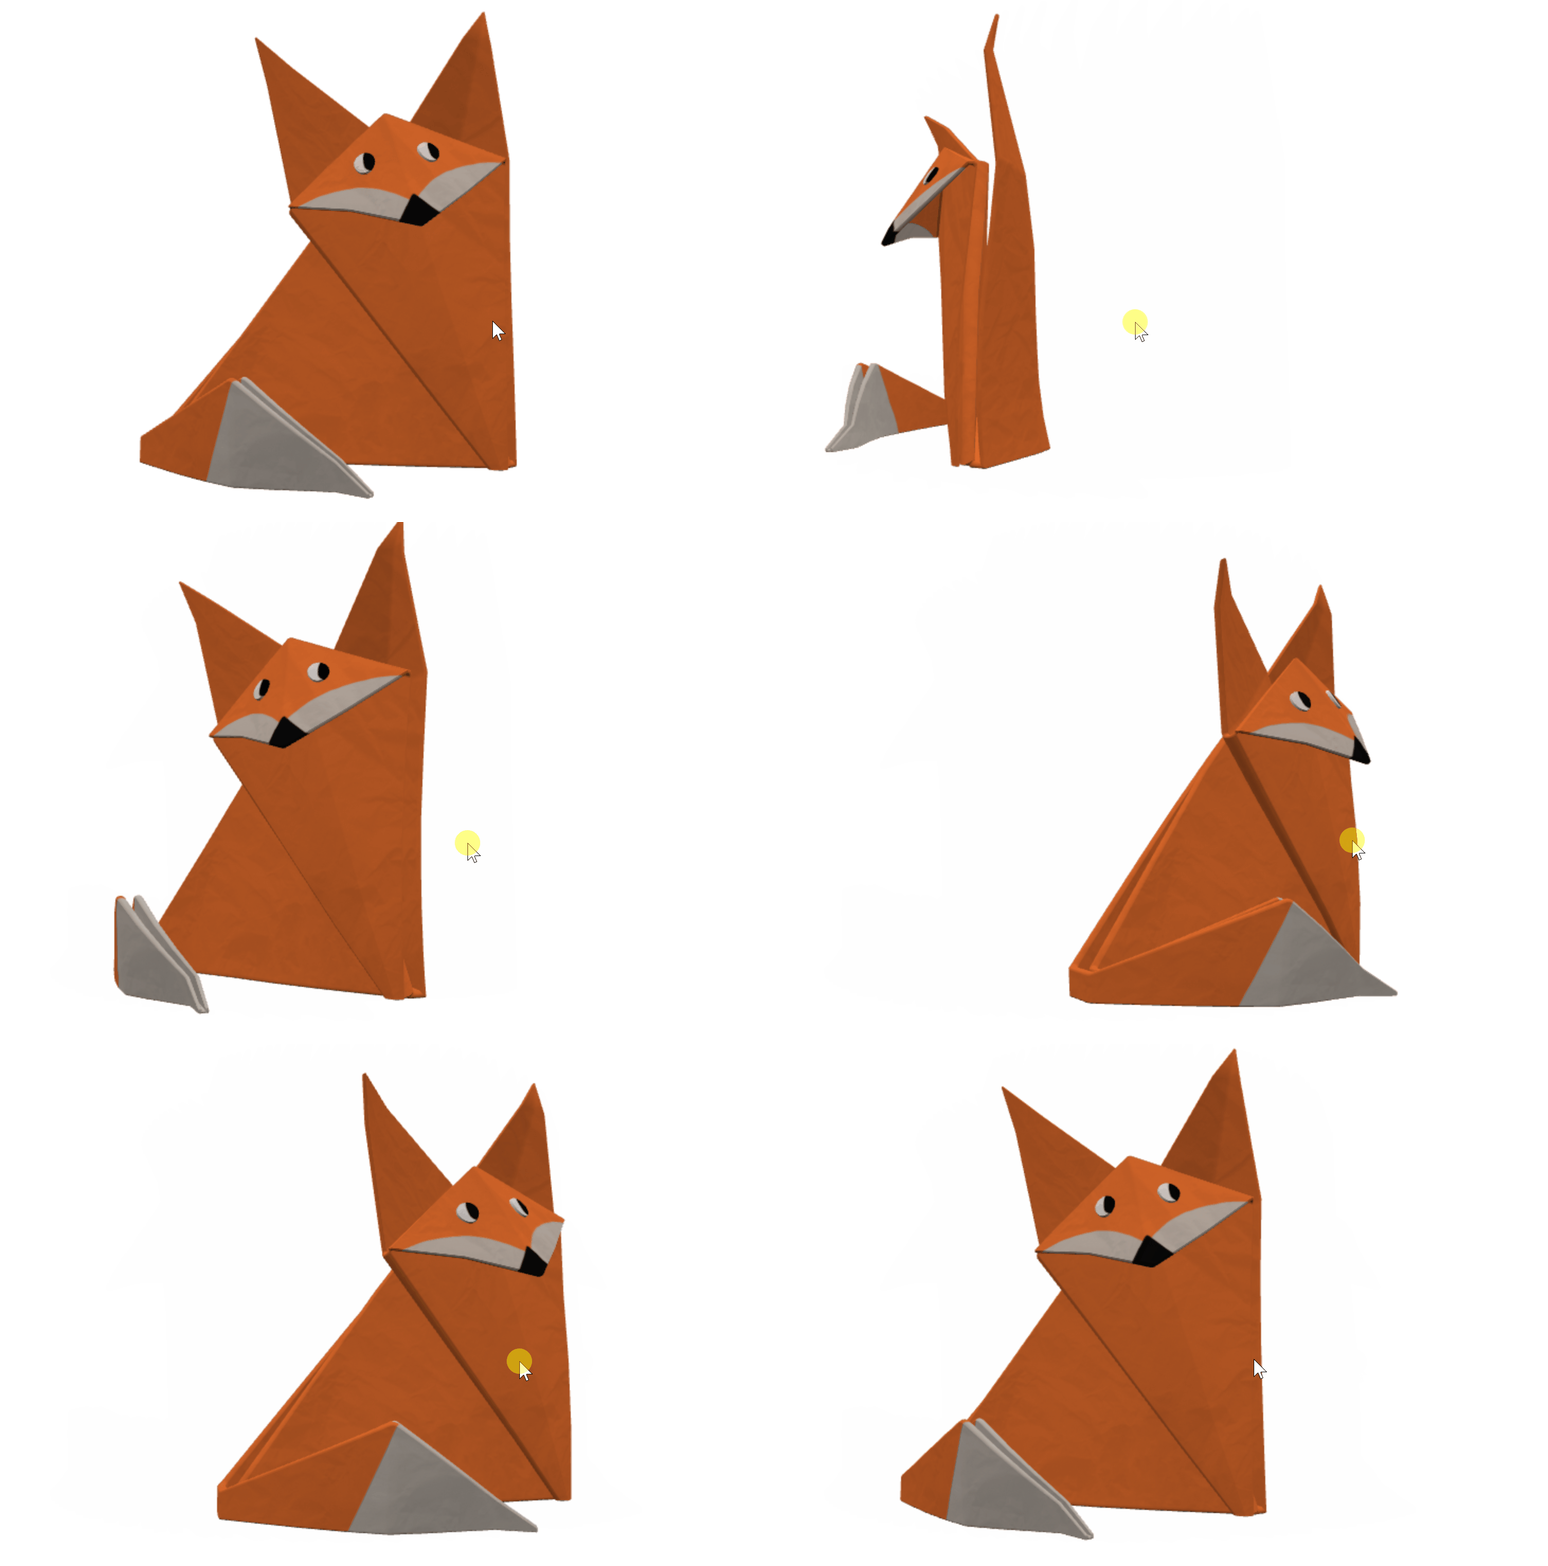
Once BabylonJS is loaded and ready, we can create the itnernal structure inside the Shadow DOM of the component. It’s not very elaborate since for the time being we only require a canvas where the BabylonJS engine will operate. After this, we need to set up the camera, lights, and scene. While there is a plethora of options that might cater to what you want, it’s probably safe to say we want to display the 3D model in the origin and have the camera rotate around it based on interactions from the user, like in the image below.
 3D origami fox on a web page
Luckily, BabylonJS allows to create a default camera and a default light. The camera is of the Arc rotate type (the one that rotates around a point), and the same method allows to attach controls to it. The method we use to do this is createDefaultCameraOrLight, which takes away all the fuss of the setup.
Load the 3D model
With the scene ready, the next step is to load a model. Depending on the file type, you will use one of several different loaders. But in our case, I am loading the model with a MeshTask. The reason for this is that this type of task comes as part of the Assets Manager, and can easily import not only .gltf and .glb files, but also .obj, and .babylon files. Additionally if we want to expand and load in the future images or other binary data, we already have the asset manager in the scene ready. You can find the information on the MeshAssetTask here. Below you can see the cration of the assetsManager and how a task is added to it.
const **assetsManager **= new **BABYLON.AssetsManager**(**scene**);
const meshTask = **assetsManager.addMeshTask**('glb task', '', path[0], path[1]);

meshTask.onSuccess = function (task){
    task.loadedMeshes[0].position = BABYLON.Vector3.Zero();
}

...

**assetsManager.load();**
Monitor changes to attributes
Last but not least, we need to monitor the attributes from the web component. If these are changed in the script or from the DOM, the model/scene should reflect this accordingly. The way to do this is by defining the observableAttributes,
static get **observedAttributes**(){
    return ['**src**', '**background-color**'];
}
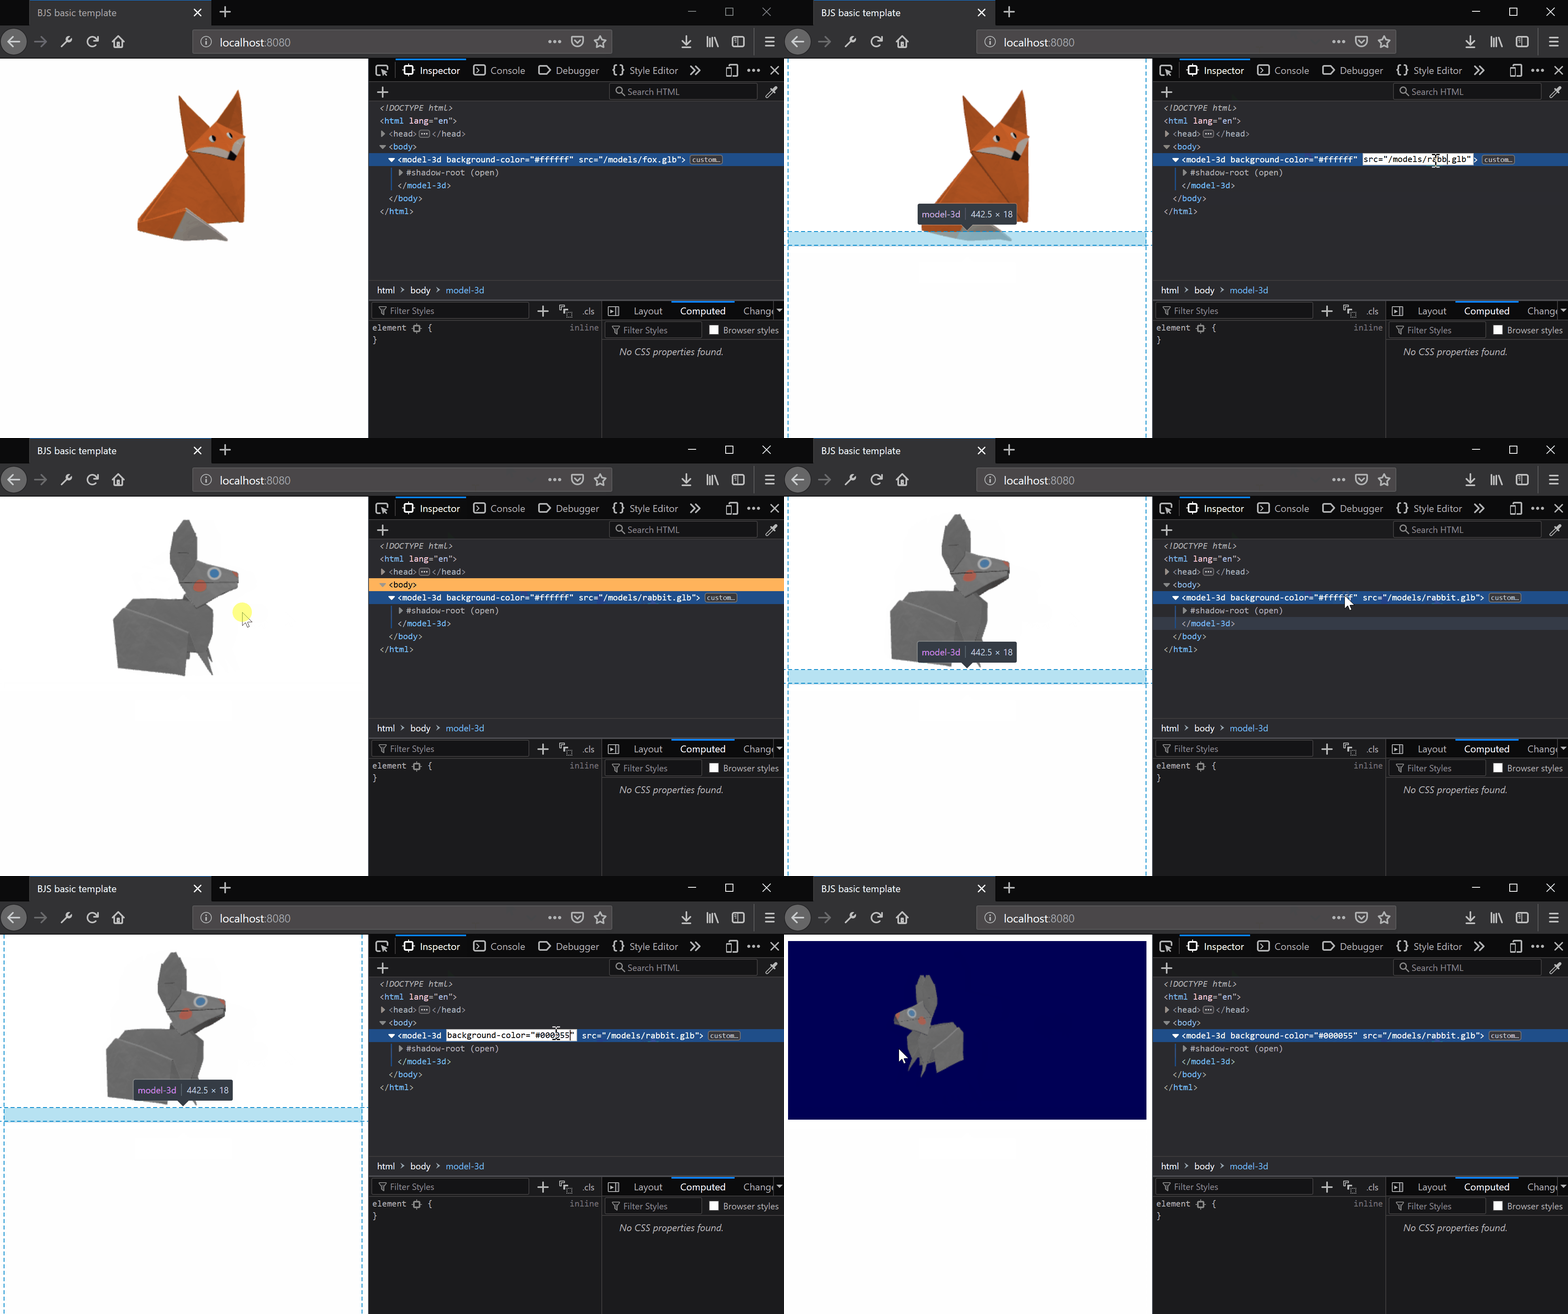
This is pretty neat, and I think is one of the powerful things about Web Components, since it really allows to customize them and behave as you would expect a DOM element to do so. In the example below we can see how changing the attribute in the HTML tag reloads the model to reflect the new source.
 Observable attributes working for the Web Component
Notice that these attributes will come handy when changing them programmatically, but also upon the initialization of the component itself, where they will change from null to the new value (color or source). This is another important reason why a promise is used when loading BabylonJS, since the initialization of the component happens before the scene is ready to load the model.
More to come
This has been an initial exploration into some pretty neat new Web technologies, with the intention of seeing how they can be used together to build compelling web experiences. I plan to expand on this example, by exploring the GLTF file format, adding WebXR support in order to display these models on a VR headset, and making some tweaks like ensuring that the BabylonJS are inserted only once even if using several components on the page. In any case, feel free to contribute and use the code as you wish. You can find the code here.
The not so nice other side
One thing that has caught my attention is how some models will load and work depending of the source, player, and even exporter used. While this is not the main focus point of this article, I will be writing a follow up post exploring GLTF, it’s current state and trying to explain and understand what is going on. For this example, I am mostly using .glb files that come from Remix3D and Paint3D. I have not been so lucky using files from Google Poly, even the ones I have created with Blocks earlier. Remember kids, for now, this web component and 3D exploration is all for the fun and learning in it.
Acknowledgements
The model used in the demo is the Origami Fox and Origami Rabbit authored by Microsoft and available from Remix3D at https://www.remix3d.com/details/G009SXD1608R?section=other-models and https://www.remix3d.com/details/G009SXD16GHF?section=other-models.
By Diego González on March 22, 2019.
