
Adding Sensors to the Web of Things
We’re big fans of connecting the web to the “Internet of Things.” This guest post from Samsung Open Source Group’s Philippe Coval, following up this post from last year from ziran sun on Internet of things and GRPR, gives some details on how we’re been progressing on this over the past year, specifically when it comes to sensors.
CONTEXT:
Since Internet was widely deployed and massively adopted, the world changed so much so regulations are also evolving.
In 2018 GDPR from EU, was established. Articles 25 and 32 are encouraging services operators to invest into “PrivacyByDesign” systems, IoT is obviously part of this.
THINGS PROJECT:
The paradigm shift from “cloud centric IoT” to the Edge is a good opportunity for FLOSS projects.
Mozilla’s Things project is one of them, this is no need to introduce Mozilla’s organization, it is mostly known for Firefox web-browser or MDN website. But do you know about their commitment to keep the web open by developing opensource focusing on user privacy and promote decentralized architectures?
Things framework is inspired by “Web Of Things” concepts and is somehow decentralized because user data stays in user’s network unless explicitly shared to a peer, this a good base to experiment with.
My first “Mozilla-IoT” contribution was the “generic sensors adapter” for the Things gateway.
Today we will focus on Mozilla’s gateway, as it is the core component of the whole “Things” framework. “Version 0.8.0 was released” on this 2019’s spring, so you can try it your own on Raspberry Pi.
The Raspberry Pi 3 is the reference platform, RPi 2 is working fine too but it should be possible to port to other single board computers (supporting GnuLinux like ARTIK , etc).
The post will explain how to get started and how to establish basic automation using I2C sensors on gateway’s device along actuators (all with “PrivacyByDesign” ) or without any cloud connection).
To get started, first install the gateway according to project’s straightforward instructions.
PREPARE SD CARD:
To use adapter version 0.4.0 or later of gateway is needed, but I encourage to install a fresh latest release.
Let’s download the Raspbian based image “gateway-0.8.0.img.zip” and dump contents of the 1.2 GB archive to SD card (4GB should be enough as 3.2 GB will be used).
sudo apt-get install sudo wget unzip file # Adapt if not on Debian or derived

version="0.8.0" # Or later
url="https://github.com/mozilla-iot/gateway/releases/download/${version}/gateway-${version}.img.zip"

lsblk # Identify your sdcard adapter ie:
dev=/dev/disk/by-id/usb-Generic-TODO

sudo sync && file "$dev"
wget -O- "$url" | funzip | sudo dd of="$dev" bs=8M oflag=dsync
sync
FIRST BOOT:
Next, install the SD card in your Raspberry Pi, (Older RPis could work too, even if you no wifi adapter).
When it has completed the first boot, you can check on your router that the Avahi daemon is registering “gateway.local” using mDNS (multicast DNS)
It should takes a couple of minutes to get up, if unsure you can ping ‘gateway.local’.
LOGGING IN:
Either you connect to the gateway by WiFi or Wired (running in your LAN), for later case you should be able to access the web server by a fixed address.
If WiFi adapter is present on your RPI then first page will be redirected to WiFi configuration page:
URL: http://gateway.local/wifi-setup
Connect to a Wi-Fi network?

...
@TizenHelper
FreeWifi_secure
public
...

[Skip]
We can skip it for now, by pressing the bottom “Skip” button.
URL: http://gateway.local/connecting

Wi-Fi setup skipped

The gateway is now being started.
Navigate to gateway.local in your web browser
while connected to same network as the gateway to continue setup.

Note: If you are unable to load gateway.local,
look up the gateway's IP address on your router.
After a short delay, the user should be able to reconnect to the entry page:
URL: http://gateway.local/

Welcome
Choose a secure web address for your gateway:
.mozilla-iot.org

[X] Please keep me updated about new features and contribution opportunities. Privacy Policy

[Skip]
The gateway can be registered on mozilla.org for remote management, but we can skip this for now.
Then administrator is now welcome to register new users:
URL: http://gateway.local/signup/

Welcome

Create your first user account:

Name: [user]
Email: [user@localhost]
Password: [password]
Confirm Password: [password]

[Next]
Now we’re ready to use it:
URL: http://gateway.local/things

No devices yet. Click + to scan for available devices.

[+]

[Menu:]

[Things]
[Rules]
[Floorplan]
[Settings]
[Log out]
FILLING DASHBOARD:
You can start filling your dashboard with Virtual Resources,
First hit the “burger menu” icon on top left, go to “settings” page, and then go to the “addons” page, press on button left “+” button.
URL: http://gateway.local/settings/addons/discovered

virtual-things-adapter 0.1.4
Mozilla IoT Virtual Things Adapter
by Mozilla IoT
Here you can “Add” a “Virtual Things” adapter, it will be then download from community repository, and status will change from “Installing…” to “Added”
Then get back to previous page using top left “back” arrow.
It should be listed along ThingURLAdapter on the adapters page:
URL: http://gateway.local/settings/adapters

ThingURLAdapter (thing-url-adapter)
VirtualThingsAdapter (virtual-things)
You can then go back to the “Things” page (it’s the first entry in the menu); we can start adding “things” by pressing the bottom “+” icon.
URL: http://gateway.local/things
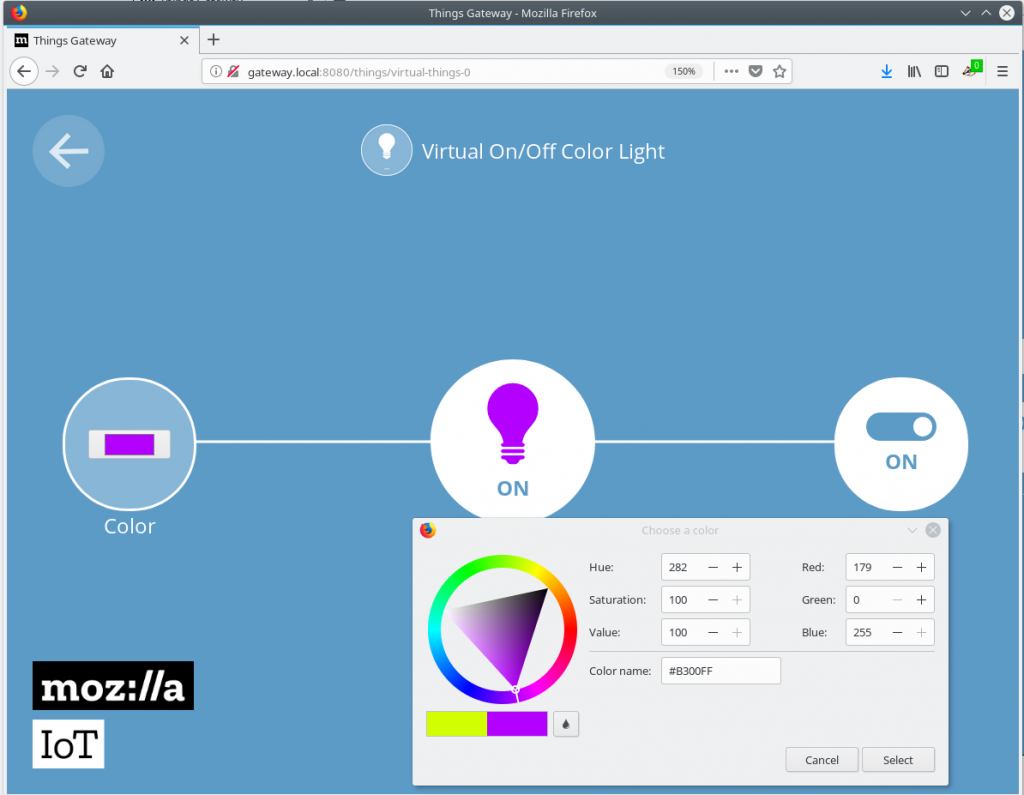
Virtual On/Off Color Light
Color Light
[Save]
Then press “Save” and “Done” at bottom of list.
From this point, you can decide to control a virtual lamp from the UI, and even establish some basic rules (second entry in menu) with more virtual resources.
 Virtual Things
SENSING REALITY:
Because IoT is not about virtual worlds (is it?), let’s see how to deal with the physical world using sensors and actuators.
For sensors, there are many way to connect them to computers using analog or digital inputs on different buses.
To make it easier for applications developers, this can be abstracted by following W3C’s generic sensors API.
While working on IoT.js’s modules, I made a “generic-sensors-lite” module that abstracted a couple of I2C drivers from the NPM repository.
To verify the concept, I have made an adapter for Mozilla’s IoT Gateway (which is running Node.js) , so I published the generic-sensors-lite NPM module first for NodeJs (it’s supporting both runtimes).
Of course you’ll need at least one real sensor attached to the I2C pins of the board.
Today only 3 modules are supported, and they are easy to find:
-
BH1750: for measuring illuminance (module is about 1 or 2 USD)
-
BMP085: for measuring temperature, or any compatible sensor (ie: BMPX8X)
For actuators, either you use virtual things, or use GPIO adapter and make some wiring on PI header.
INSTALL MOZILLA-IOT-GENERIC-SENSORS-ADAPTER:
Since addon landed in repository so the procedure is same:
Go to addon menu, select, add, it’s trivial
URL: http://gateway.local/settings/addons

Generic Sensors 0.0.8 Generic Sensors devices support....
Then add our sensors things:
URL: http://gateway.local/things

Ambient Light Sensor
(Multi Level Sensor)
[Save]

Color Sensor
(Custom thing)
[Save]

Temperature Sensor
(Multi Level Sensor)
[Save]
Then “Done” button at bottom of page.
Then they will appear on page and they should be turned on individually on respective page:
-
http://gateway.local/things/generic-sensors-2# (Temperature)
To get value updated in the UI, they need to be turned on first.
SIMULATE:
If you don’t have any sensors devices, they can be mocked using “simulator” controllers,
For example the Color Sensor is removed, it can be edited from adaptor’s schemas:
From Menu / Settings / Addons / Generic Sensors / Configure
URL: http://gateway.local/settings/addons/config/generic-sensors-adapter

generic-sensors
(...)
type: customSensor
sensorType: colorSensor
sensorController: tcs34725
(...)
Replace “sensorController” value to “simulator”, and press Apply. Then back to “things” page, add the “Color Sensor” , turn it on and you’ll see the color updated randomly each seconds.
Note that color sensor is not yet an approved “W3C generic sensor” but it can be a good example to learn IoT.js, WebThings or even do some UI/XR experiments.
MORE:
If you have or want other sensors to be supported, just file a ticket in “generic-sensors-lite” .
Developing on device is also possible. Just enable SSH and clone the adapter:
url=https://github.com/rzr/mozilla-iot-generic-sensors-adapter
dir=${HOME}/.mozilla-iot/addons/generic-sensors-adapter
git clone --depth 1 $url $dir
cd $dir
npm install
I2C bus is enabled by default, on issues you can double check if sensors’ addresses are present on I2C the bus:
sudo apt-get install i2c-tools
/usr/sbin/i2cdetect -y 1
#|      0  1  2  3  4  5  6  7  8  9  a  b  c  d  e  f
#| 00: -- -- -- -- -- -- -- -- -- -- -- -- -- -- -- --
#| 10: -- -- -- -- -- -- -- -- -- -- -- -- -- -- -- --
#| 20: -- -- -- 23 -- -- -- -- -- 29 -- -- -- -- -- --
#| 30: -- -- -- -- -- -- -- -- -- -- -- -- -- -- -- --
#| 40: -- -- -- -- -- -- -- -- -- -- -- -- -- -- -- --
#| 50: -- -- -- -- -- -- -- -- -- -- -- -- -- -- -- --
#| 60: -- -- -- -- -- -- -- -- -- -- -- -- -- -- -- --
#| 70: -- -- -- -- -- -- -- 77
 Ambient Light Sensor
RESOURCES:
LICENSE:
By RzR on June 26, 2019.