
inside the bubble
Or how to easily create 360° immersive experiences with photos in WebVR and PWAs.

A couple of weeks ago I was on vacations and while taking 360° pictures of my trip, I realized something: I couldn’t share those pictures with my friends and family because they required to download an app to view them. Annoying right?
don’t burst my bubble!
Luckily the solution was not hard to implement, and it supports a plethora of devices in all shapes and sizes, no app or annoyances needed. Let’s see this solution, and more important, how it was built, and how you can extend it!
It’s a simple idea, why does it have to be so complicated to share these type of images?
TL;DR:
- Use the File API to select an image from the device.
- Create a temporary URL to this image.
- Dynamically create an A-Frame scene and set its sky to the uploaded image.
- Manage GUI accordingly and repeat to upload another picture.
- Add a Service Worker to enable offline use.
bubble: a 360° image viewer
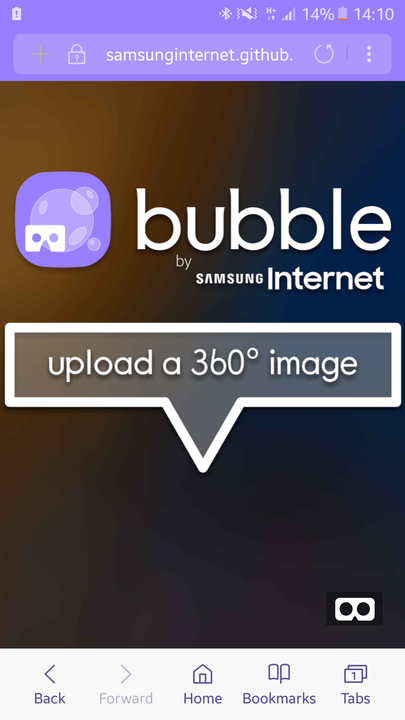
bubble: https://samsunginternet.github.io/bubble/
See it in action here!
bubble by Samsung Internet #WebVR #PWA
Let’s first take a look at the final web app. You can find it here. It consists of a banner that once you tap on it, you can select a 360° image and it will load it. The app also allows you to view the image on a VR headset. It shouldn’t require network connectivity either, we just want to see a 360° picture! It’s a simple idea, why does it have to be so complicated to share these type of images? If you want to see another picture, just tap the tab on the top to bring the banner down again and select another image.
making bubbles… it’s easier than it looks!
In order to develop bubble, we used A-Frame. This provides us with an easy way to create a VR scene that runs on the web and enables WebVR behaviors on compatible devices (sensors on a mobile device for example). Among the primitives that a-frame has we find the a-sky. As the documentation states, this primitive adds a background to a scene, or displays a 360 photo, which is what we are looking to achieve. That right there is half the problem solved. What we need now is to be able to access the image from the file system of the device and then load it in this a-sky.
Retrieving the image from the file system
The File interface provides us with information about files. We can access their content through JavaScript. Using the file input element we are able to retrieve a list of file names from the file system. Once we have them, we can create temporary URLs that represents the specified file or blob. In our bubble app, once the user clicks on the input GUI and selects an image, we create a DOMString that contains a URL that represents this image. The createObjectURL method handles this for us. You can notice how it is being manipulated as a URL for the source of an image. This is the other half of the task at hand.
img.src = window.URL.createObjectURL(files[0]);
Displaying the image in 360°
As any image that has its source set programmatically, we can set a callback to the load event, and here is where we link to the displaying mechanism. I mentioned earlier that the a-sky does this. What we need is to assign this image that we just loaded to the sky of our scene. Upon handling the load event of our newly created image, we create the scene, the assets section of the scene, and the sky.
img.onload = function() {
        var sky = document.createElement('a-sky');
        var scene = document.createElement('a-scene');
        var assets = document.createElement('a-assets');
        virtualPlaceholder = document.getElementById('virtualArea');
        virtualPlaceholder.innerHTML = "";
assets.appendChild(img);
sky.setAttribute(‘src’, ‘#texture’);
sky.setAttribute(‘color’, ‘#153453’);
scene.appendChild(assets);
scene.appendChild(sky);
virtualPlaceholder.appendChild(scene);
window.URL.revokeObjectURL(this.src);
}
Consequently, we set the loaded image to our assets, our asset and sky to the scene, our image’s reference to the sky and the scene to the div we have assigned as a placeholder in the HTML page. Very important to tidy after ourselves, so we should revoke the URL we created for the image once we have used it.
It’s fairly simple as you can see. The JavaScript file is around 50 lines of code. The rest is graphical bling to beautify the app a bit.
“One more thing…”
Ambient badging.
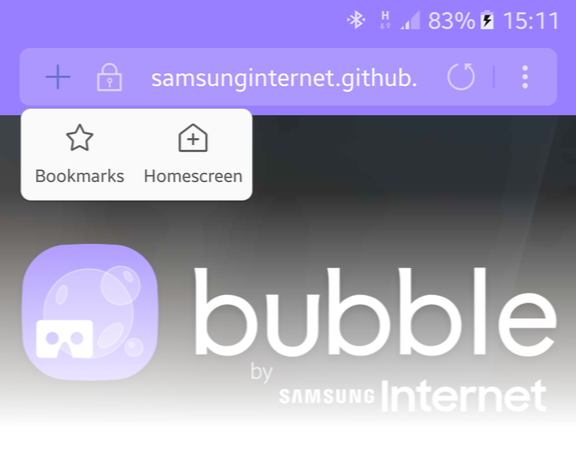
Ambient Badging in Samsung Internet 5.0
If you are using our beta, you might have noticed that next to the URL of the website you are now able to see a plus sign “+”. Once you tap on it, you get the options to bookmark the page or to add the app to the home screen. What does this mean? It means the app has enabled the minimum required functionality to be a Progressive Web App (PWA), which in itself encompasses among other things that it can be used offline (and is responsive… and is secure… and…). You can read some examples on how can you develop PWAs with the Snapwat example, or read these highlights. Or look at Podle’s code. Or read this Smashing Mag article. There are plenty of resources. Bottom line, once you install this app to your home screen, you can use it offline as any other application in your device. So you go to a web site, install that app on your device and enjoy the benefits of a nice lightweight app-store-hassle-free 360° image viewing app.
Go on, enhance it.
The app is yours. Use it. Copy it. Modify it. Distribute it. There are many enhancements that can be made. Download the code here and expand it.
Finally, if you have any questions or suggestions, feel free to get in touch with us! I am uploading some images if you want to try the app for yourself!
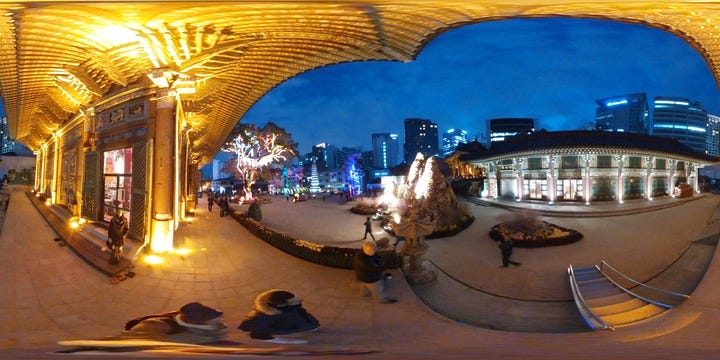
Example image for bubble

Example image for bubble
Tagged in JavaScript, Web Development, Samsung, Internet, Pwa
By Diego González on December 12, 2016.